How To Mapping The World
A Feature Point is a distinct, high-contrast visual feature in an image. A corner of a poster on the wall, the grain on a wooden floor or a detail in the facade of a building.
Map construction works by finding the same Feature Points in multiple images from different viewpoints and estimating the 3D structure of scene by triangulating those feature points.
The app requires a license. You can apply for a free commercial license by sending an email to us(info@phantomsxr.com). The email content format is as follows.
- Subject: [Request] XRMOD WorldMapper License
- Content: The name of the applicant's company or individual, and the industry sector to be used.
It is important to try to cover the target environment from multiple viewpoints and possibly different distances if necessary.
You should aim to have even as much as 50% overlap between images you want to match.
For best results, the same Feature Points should be matched in at least 3 different images
When mapping, our Mapping App will notify you if subsequent images can be connected by matching Feature Points.
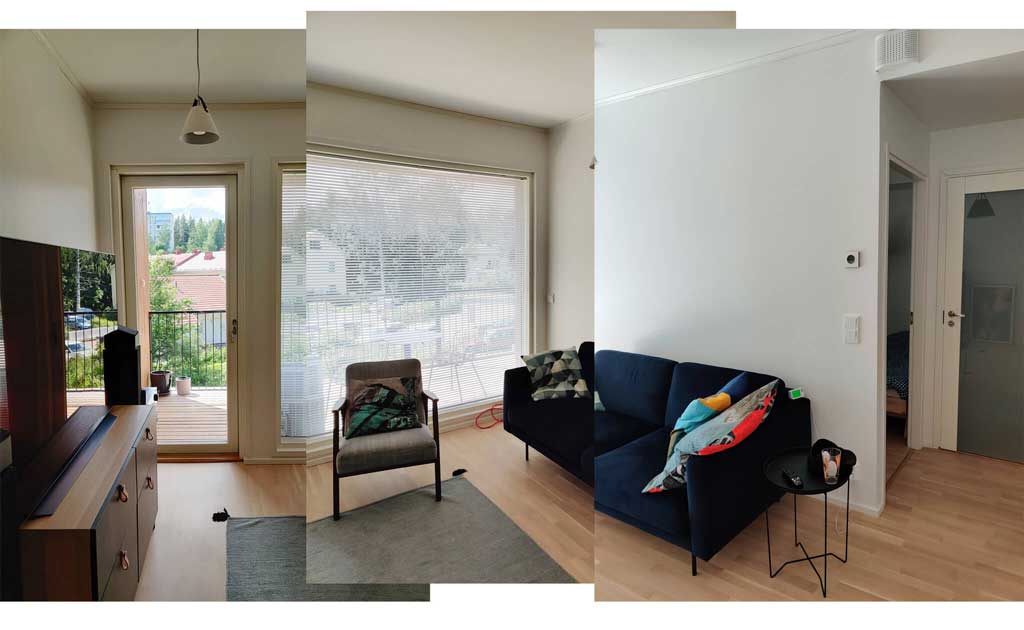
Below is an illustration of 9 captured images and how they connect to each other.

Keep in mind that not all sequential images need to connect!
The above images were captured in sequence, and images 3 and 4 are not connected to each other. That does not matter as, for example, image 3 will connect to 1, 2 and 9 when the map is constructed.
Space Requirements
Not all spaces can be mapped.
For example, highly reflective surfaces don't have static visual features for map construction.
Another problem is large areas with uniform color with no detectable visual features at all.
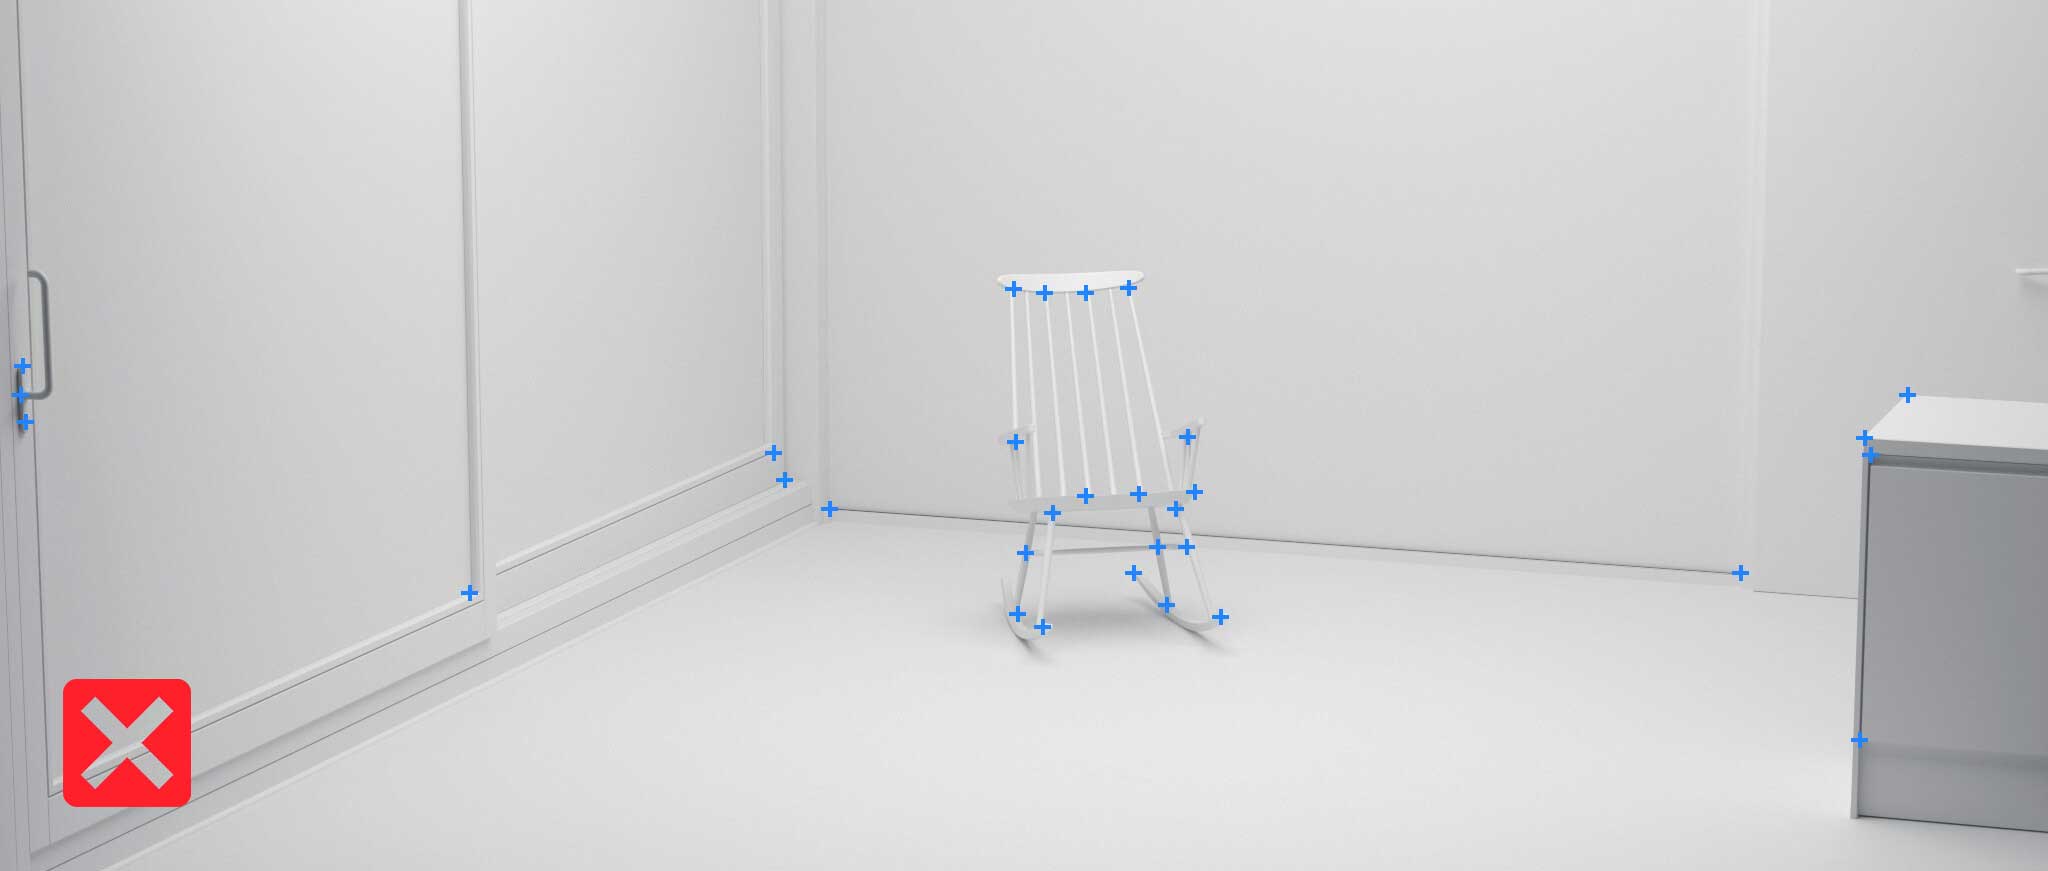
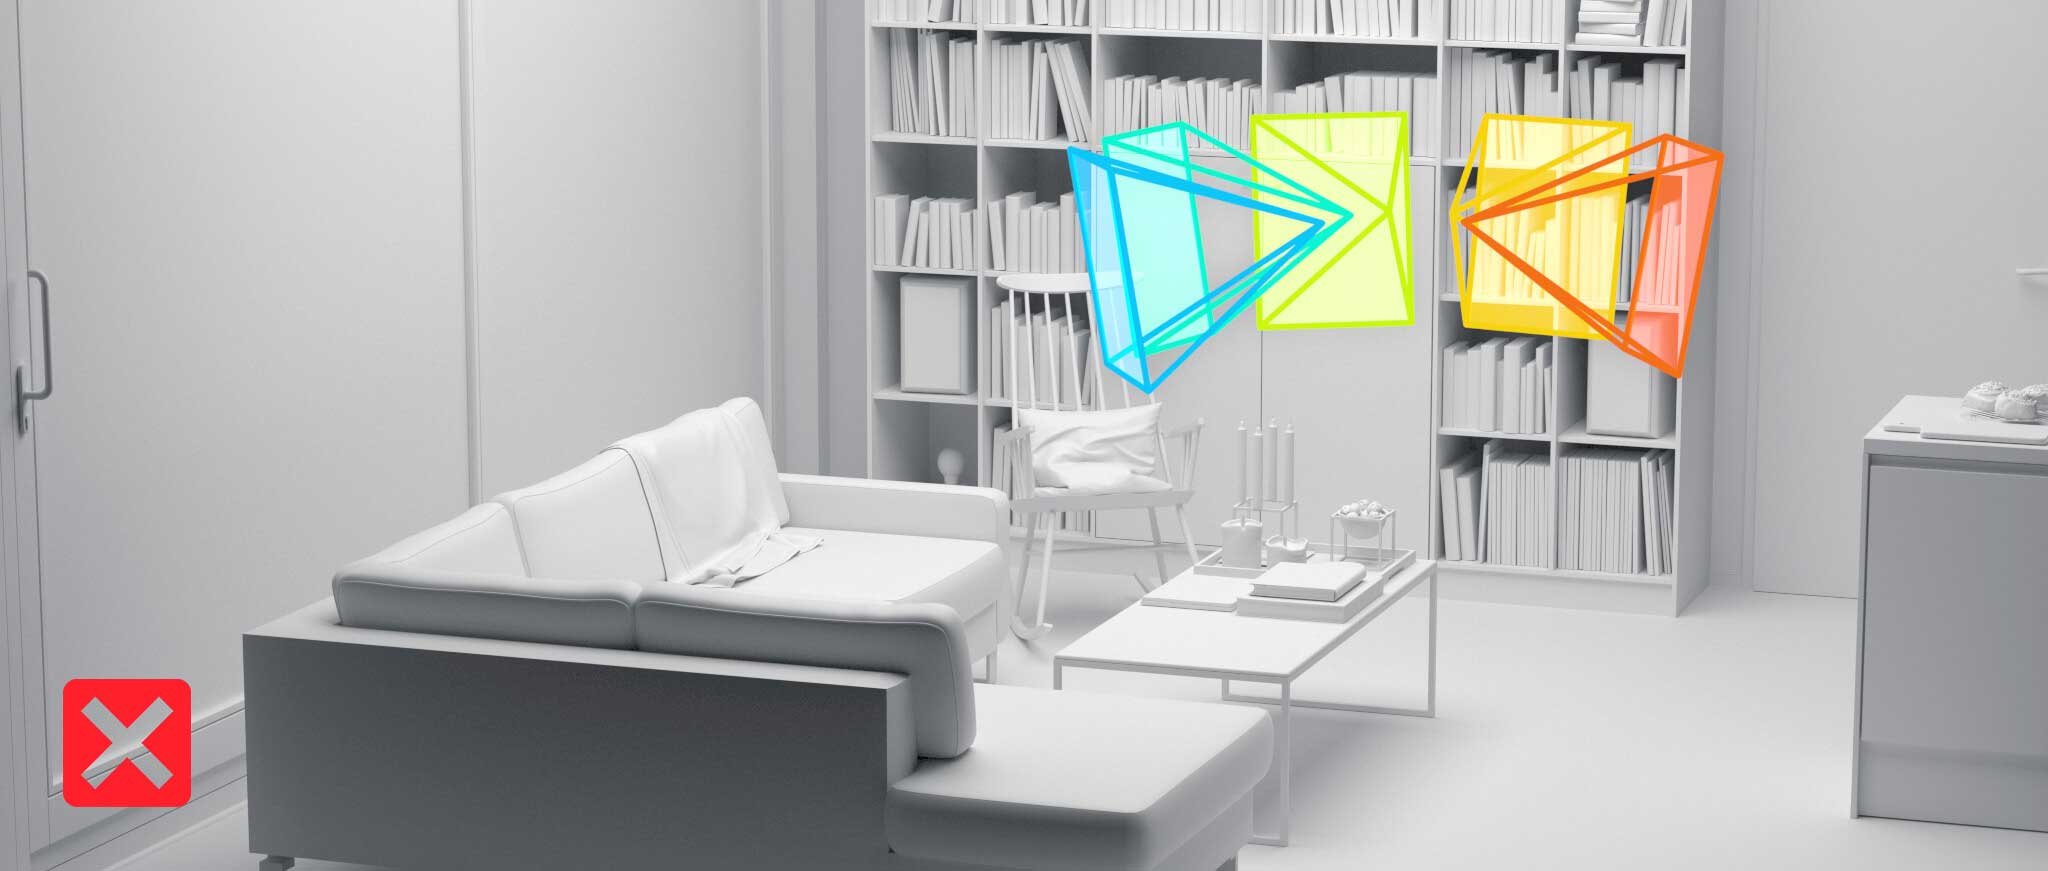
Not enough visual features and most of them are on an object that is likely to move around.
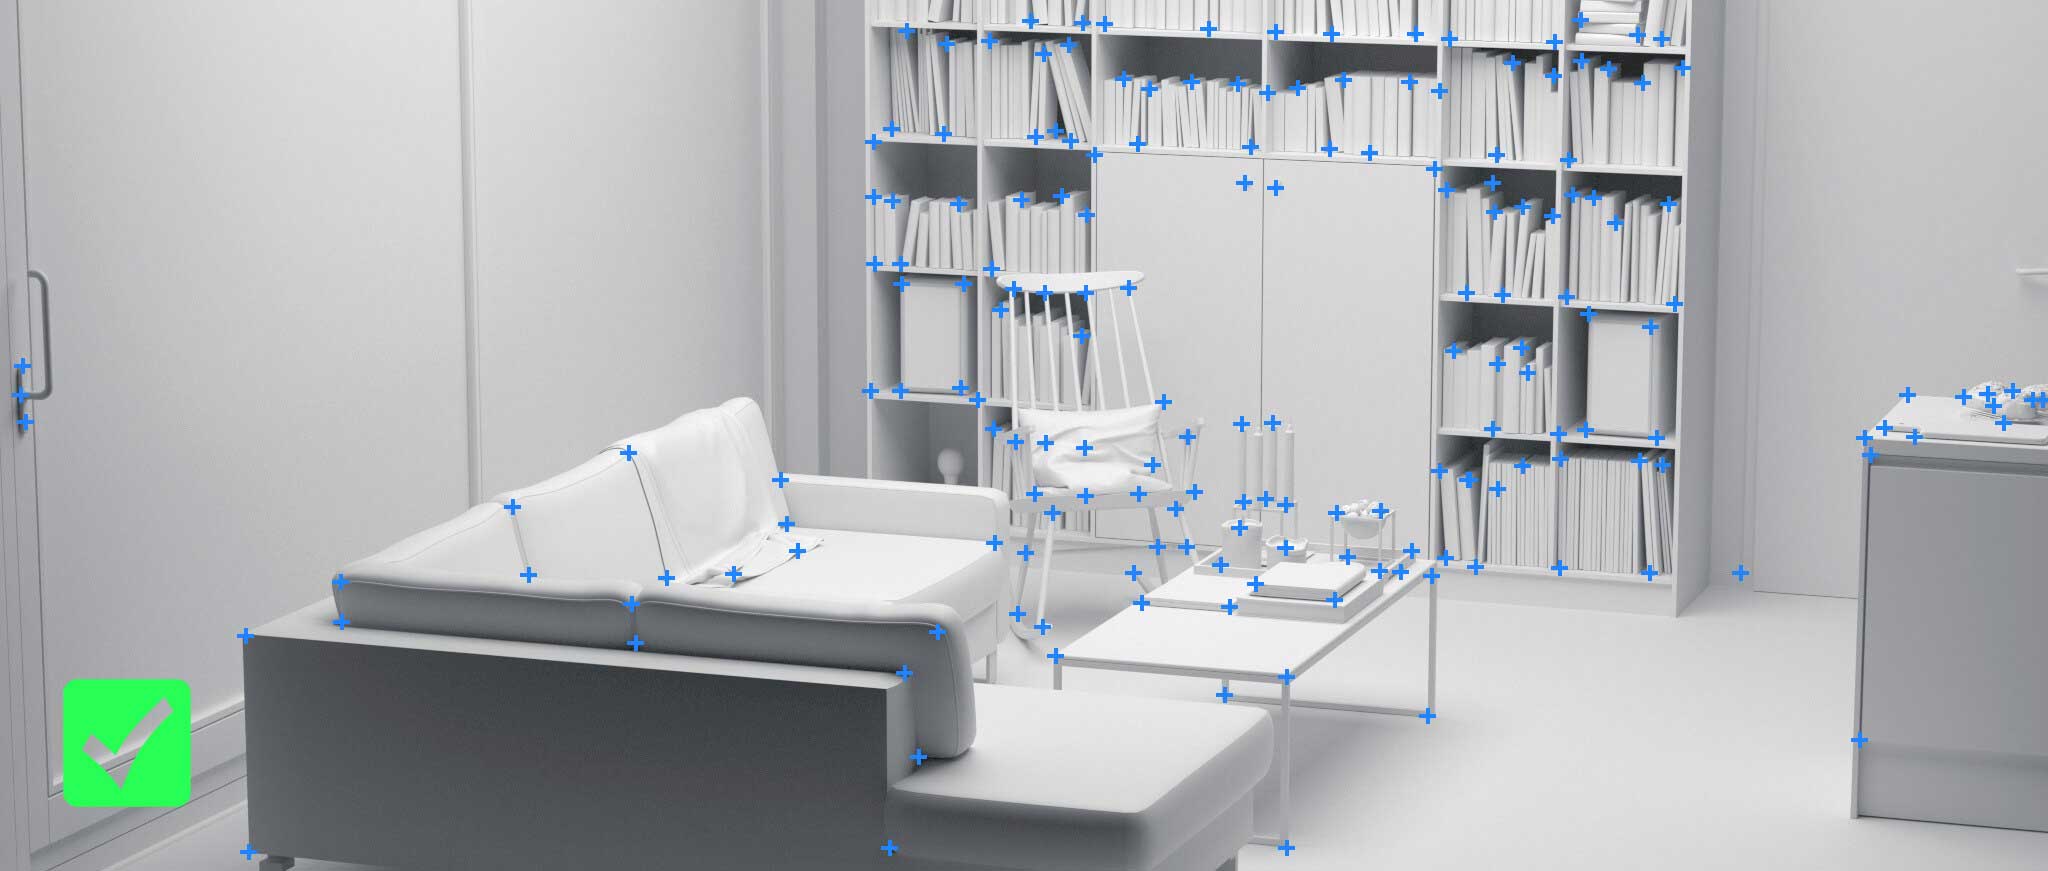
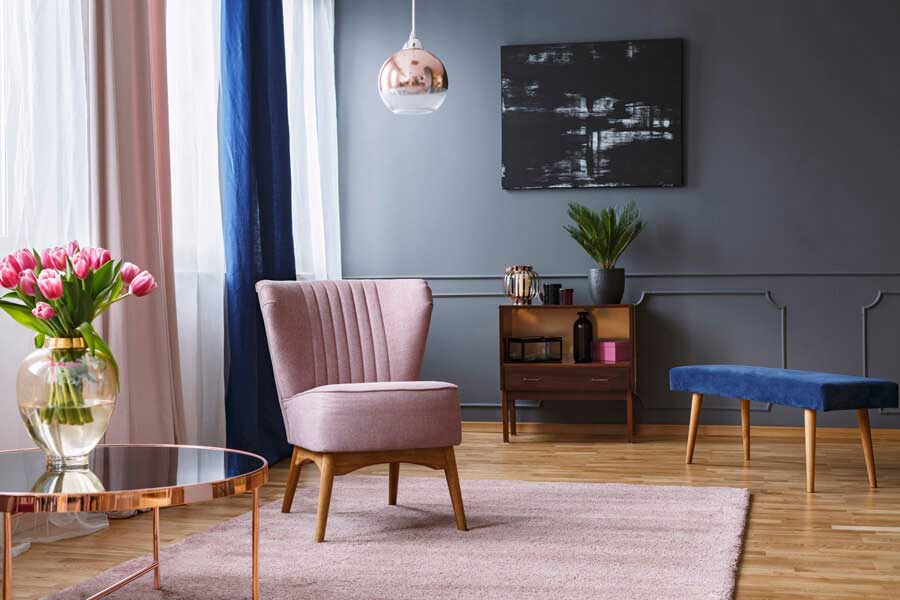
Plenty of visual features. Some of them are still on a moving object, but many others are on static surfaces. This kind of a scene can be mapped easily.

Reflective surfaces cause the camera to see false visual features. These reflected features will move visually depending on the viewpoint and can not be used for construction.
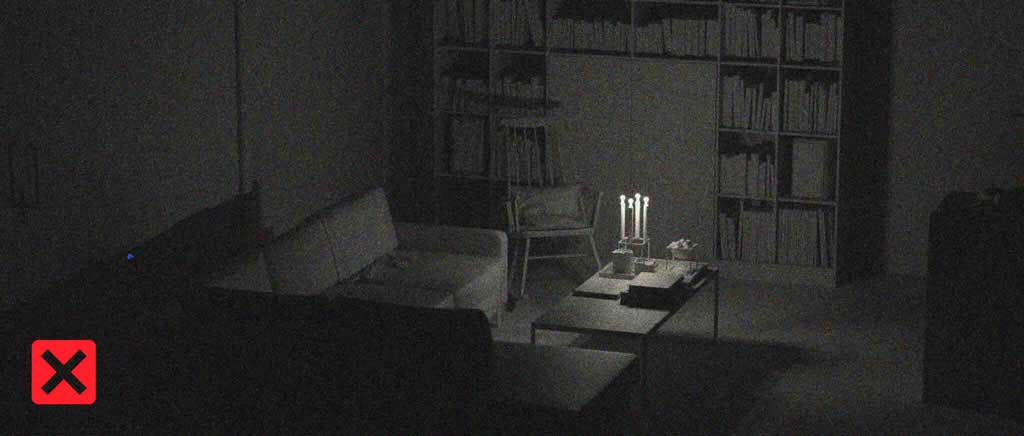
Low-light scenes will be difficult for the camera to see. Any visual features will likely be fuzzy, noisy and cause problems if they are even detected.
Mapping instructions
To construct a good map, the captured images need to cover the same areas from different angles.
When localizing against a map, the map should contain data from a captured image with a similar viewpoint in it.
The captured images don't need to be identical by any means, but should have a roughly similar angle and distance to target.
The more captured images a Feature Point appears in, the better its accuracy will be. The system requires a Feature Point to be found in two captured images, but more will be better.

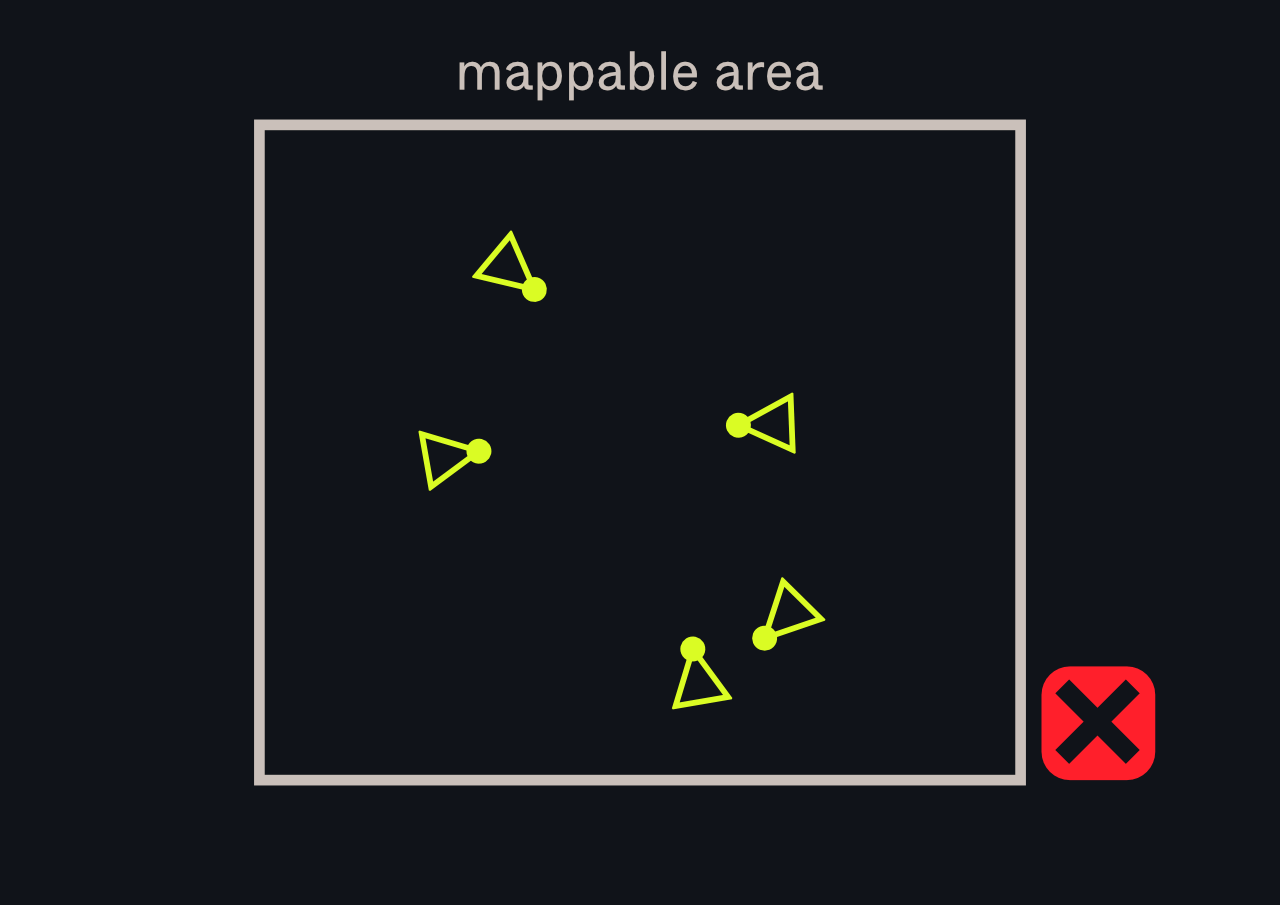
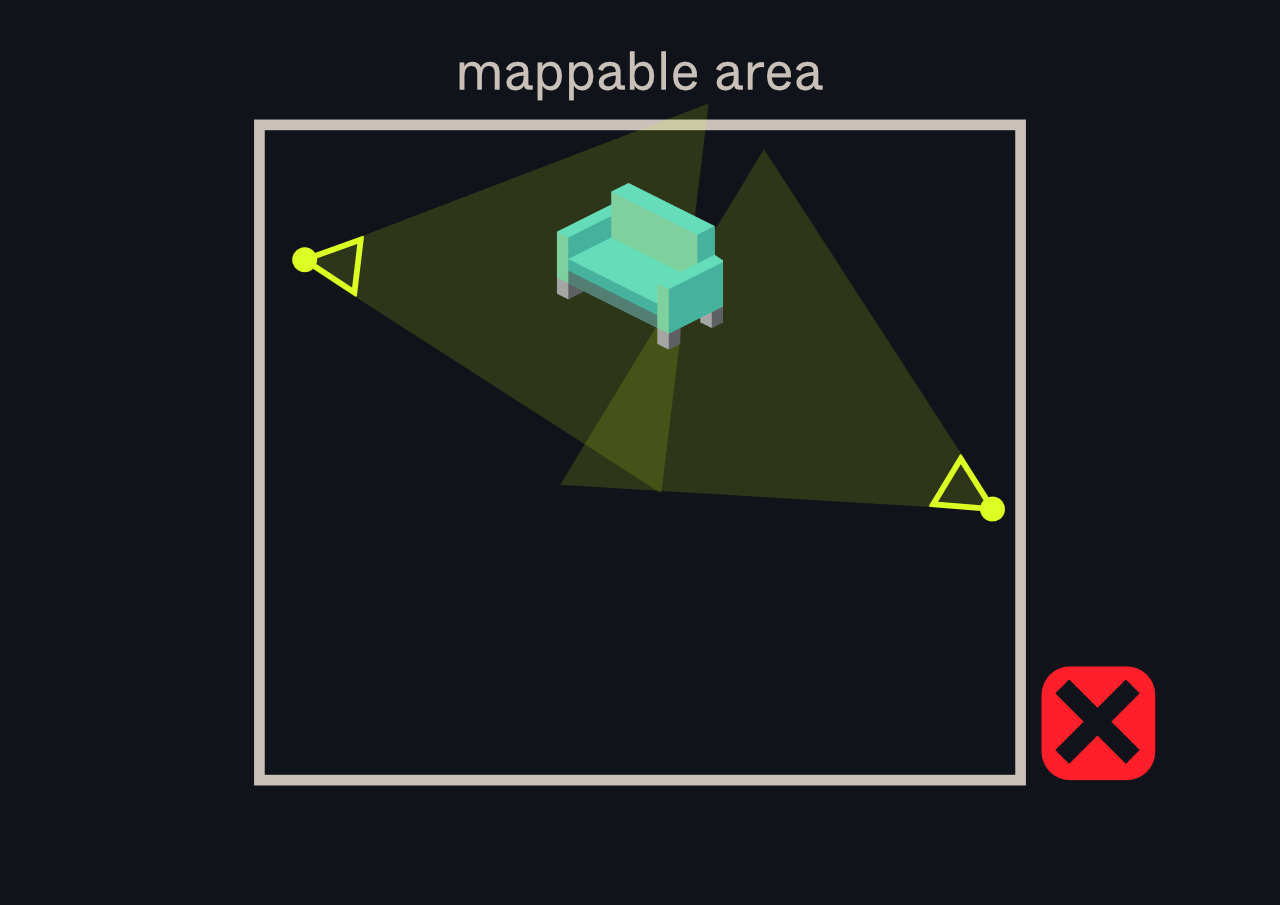
No overlap between captured images as all the images are viewing different directions. Matching features can't be found between them and the images will not connect.
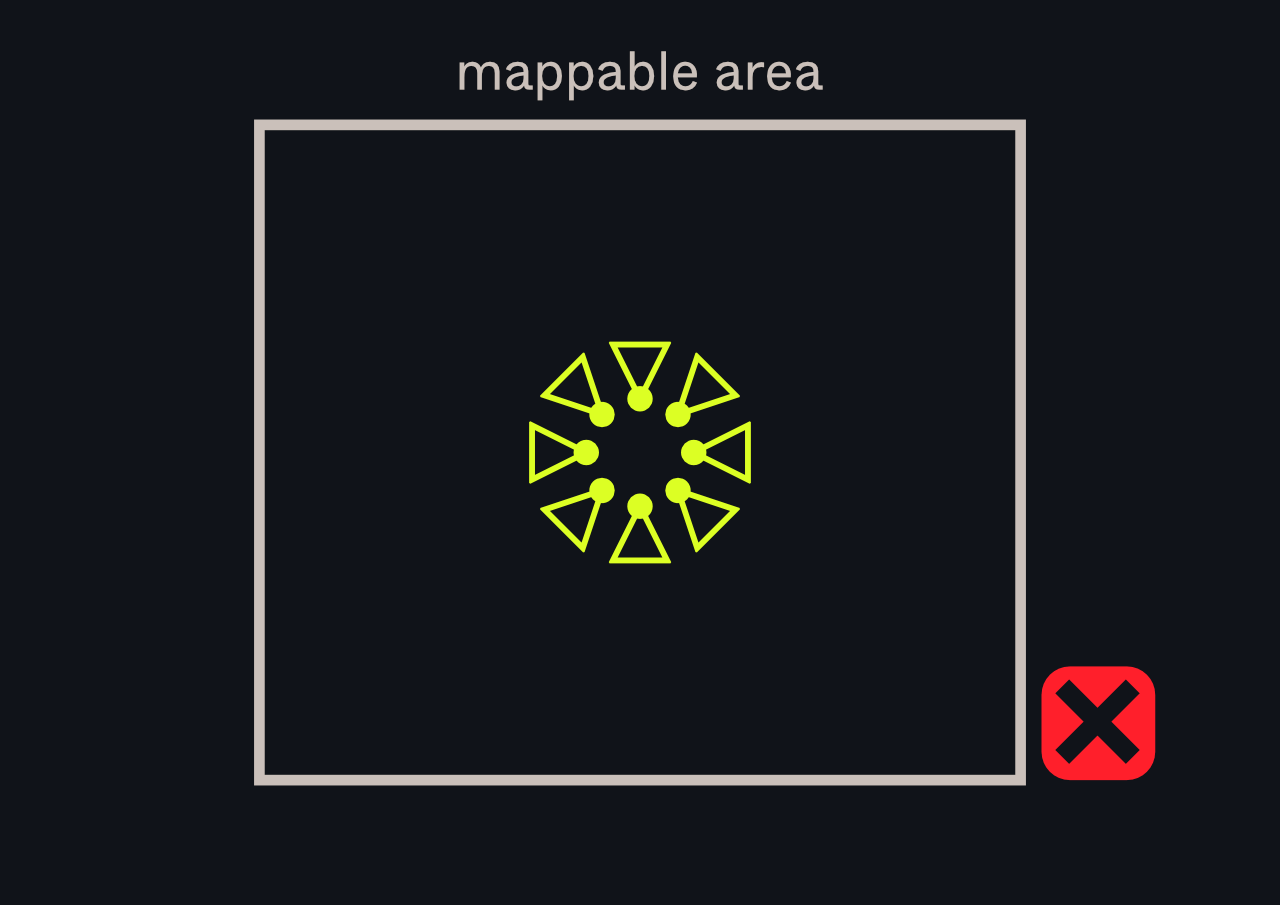
No parallax between sets, all images are captured from a single viewpoint.
Matching Features Points are found but the resulting map either fails or is inaccurate with no distance between captured images.
For better results, capture images further apart from each other or capture many "panoramas" if you already have some experience with mapping.
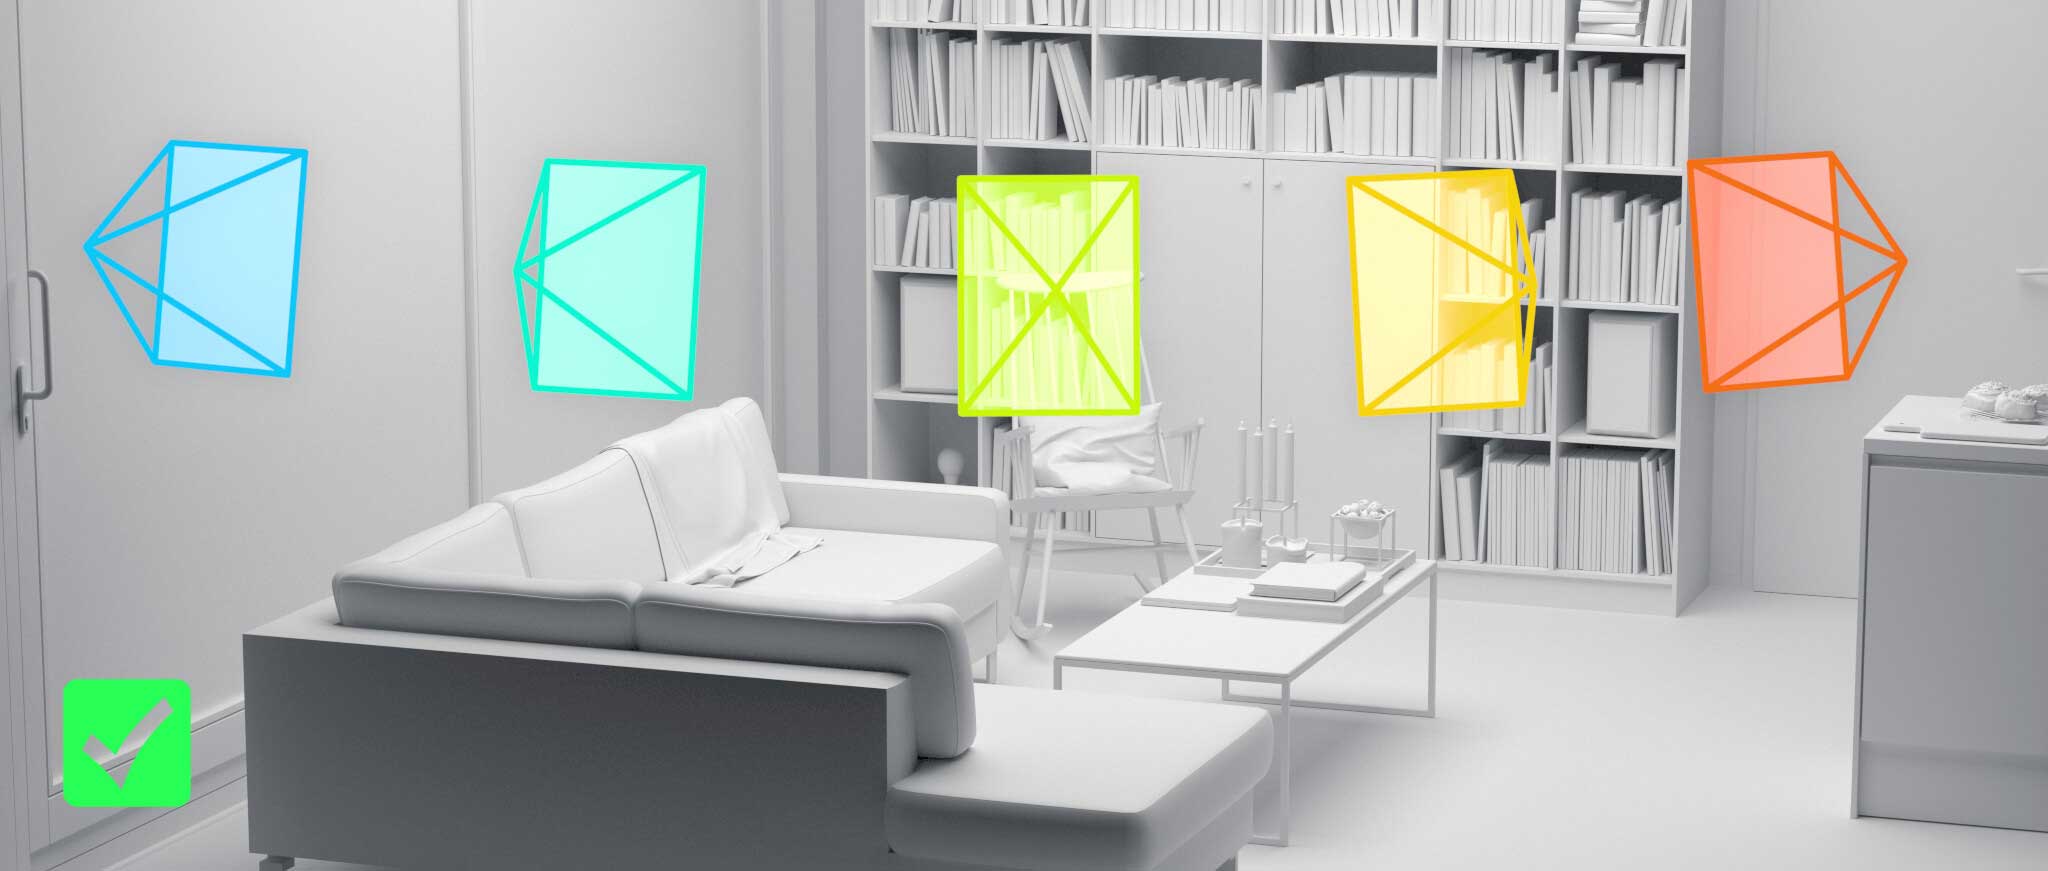
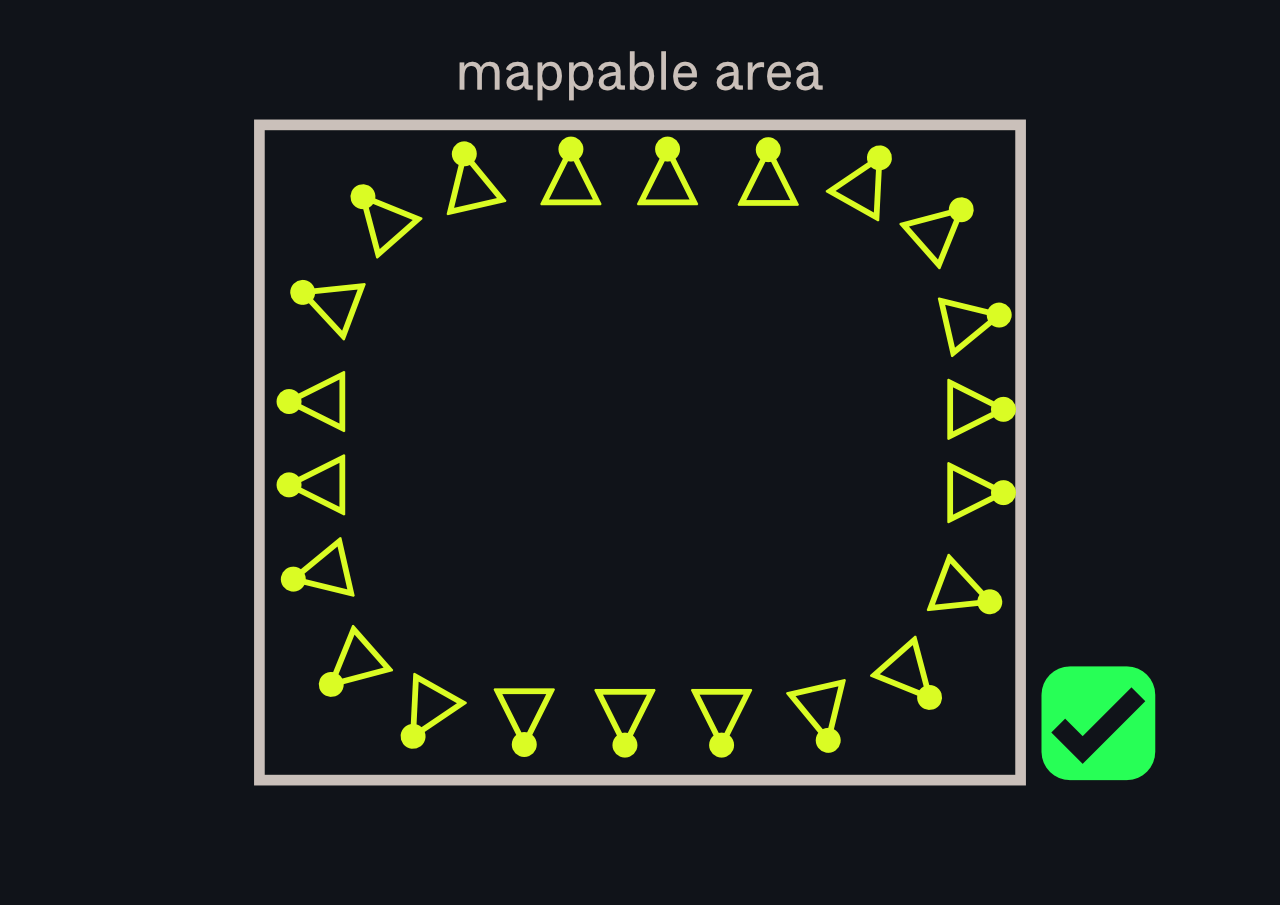
Nice overlap of Feature Points between captured imaged and plenty of parallax between them. The resulting map will be very accurate.
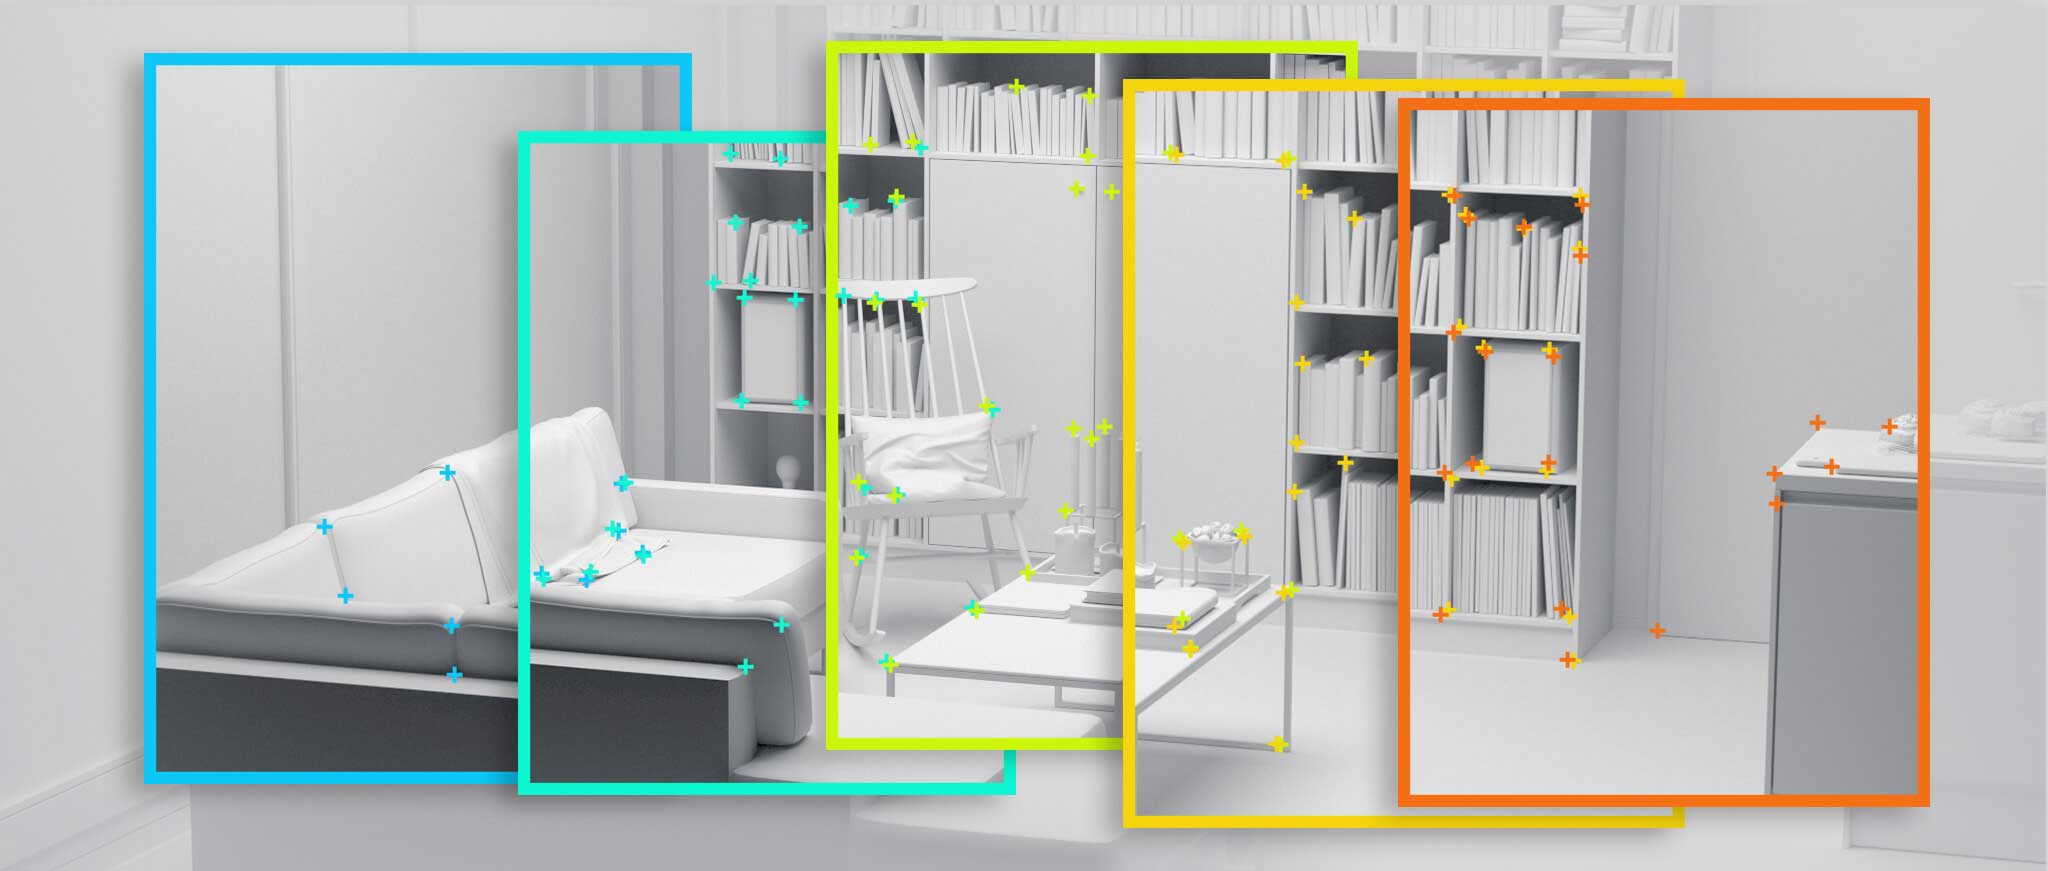
This image illustrates the overlapping Feature Points between sequential captured images.
For a good connection between images, you should aim to have images overlap from one third up to half of the image area. This makes sure that enough of the same features are found between different images.
To make sure an area or an object is included in the map, you need to have at least 3 different but similar viewpoints of the object.
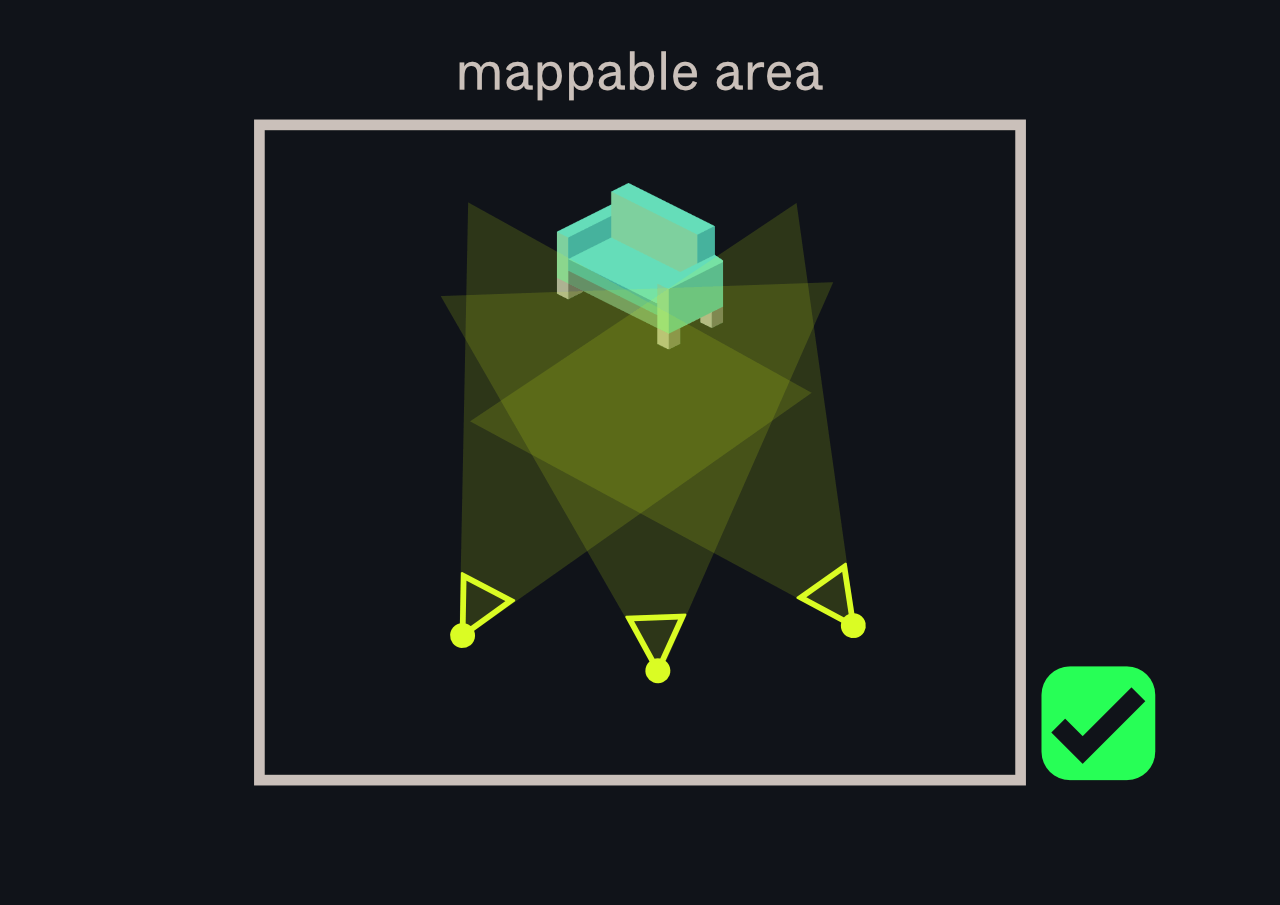
At least 3 different but similar enough viewpoints of the object and its visual fea
At least 3 different but similar enough viewpoints of the object and its visual fea
Examples
"AR Hotspot"
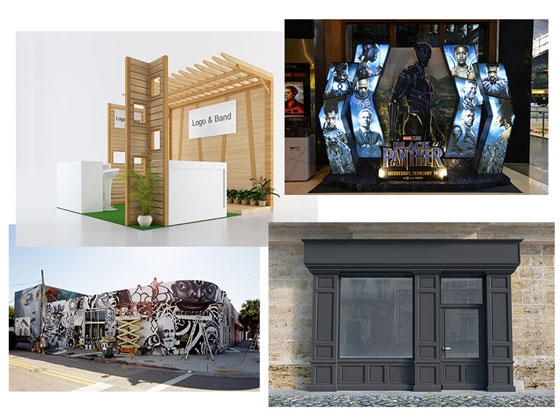
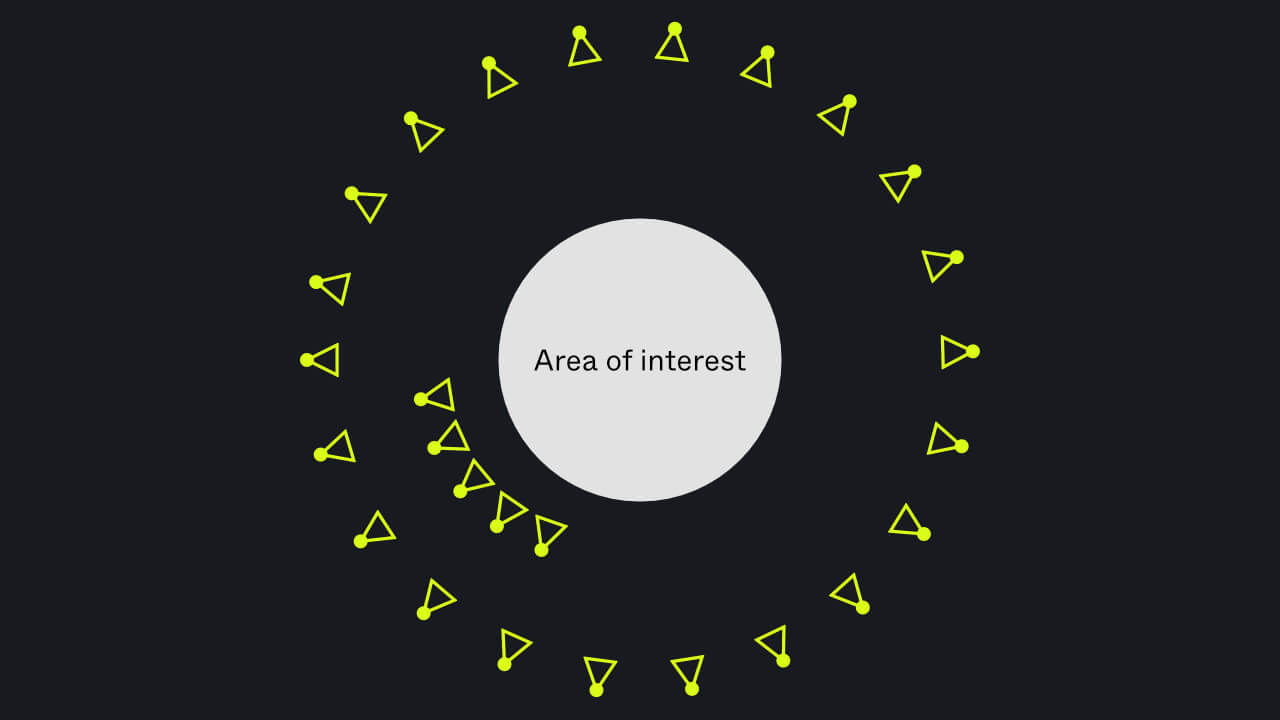
Small to medium specific locations that when viewed, are enhanced with Augmented Reality content.
These locations do not require mapping everything around the user, just the point of interest.
Examples of hotspots are statues, murals and other street art. Also storefronts, pop-up stores and exhibitions boothes and installations for movie marketing campaigns.
When mapping such hotspots, try to cover as much as possible from as many angles as possible. Take a series of images that overlap with each other. If you need to cover a specific part of the hotspot with extra detail, you can take close-ups of that area.
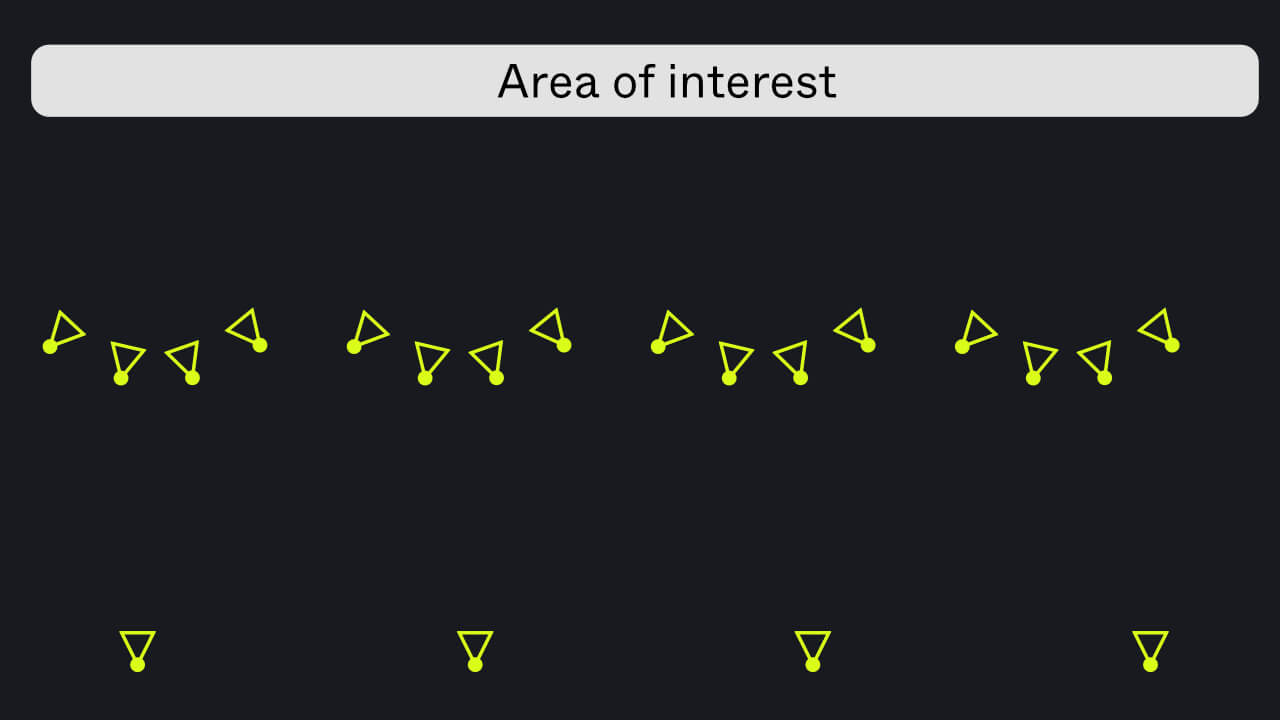
If you need to map a very long area that would be difficult to cover in one arc, you can try to cover it with multiple "mini-arcs" as illustrated below.
You can also take additional images from further away. These will help our SDK to localize to the scene from further away and also will help to connect everything together.
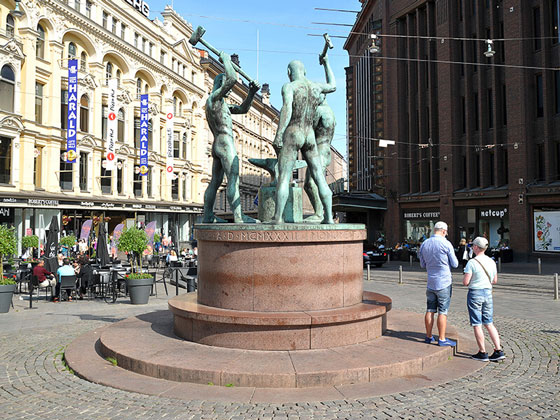
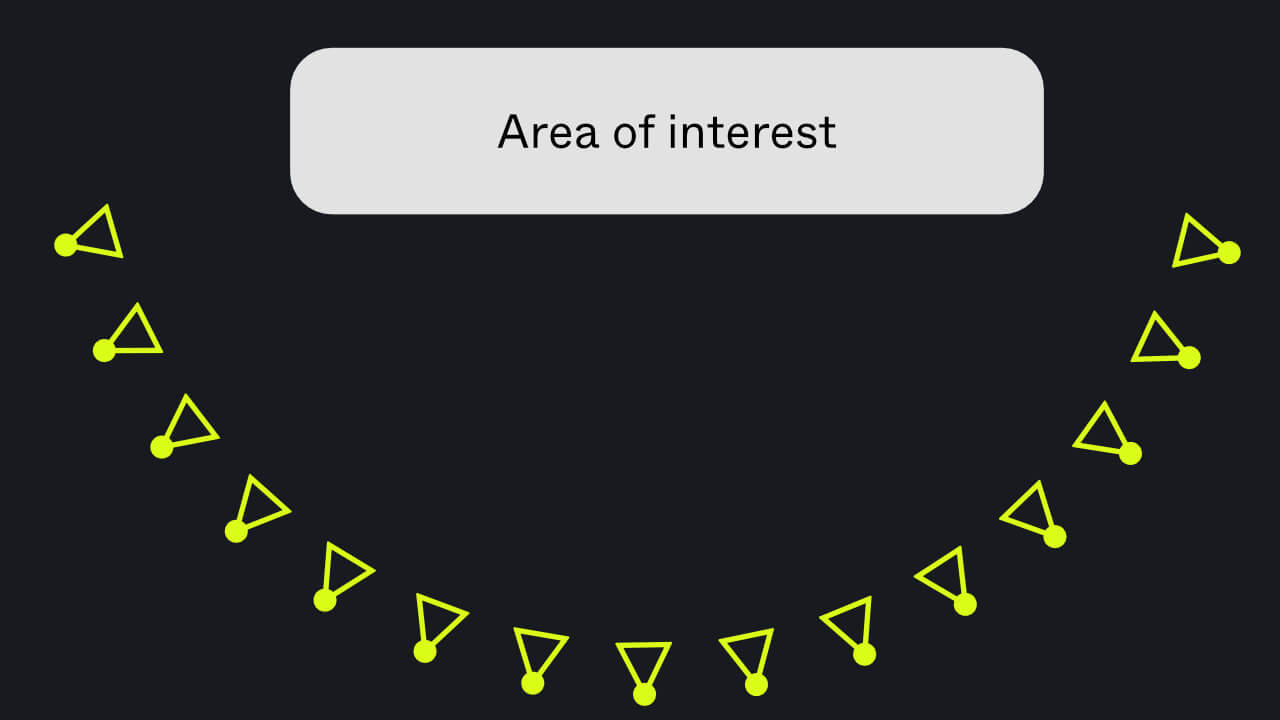
Landmarks like statues are a good example of a hotspot location that can be mapped from all around. To map a statue like this, just take a series of images in one full circle around it.
Try to fit all important visual features in the images. You can map either in landscape or portrait mode. You can also mix orientations if you want to cover some parts with close-ups.
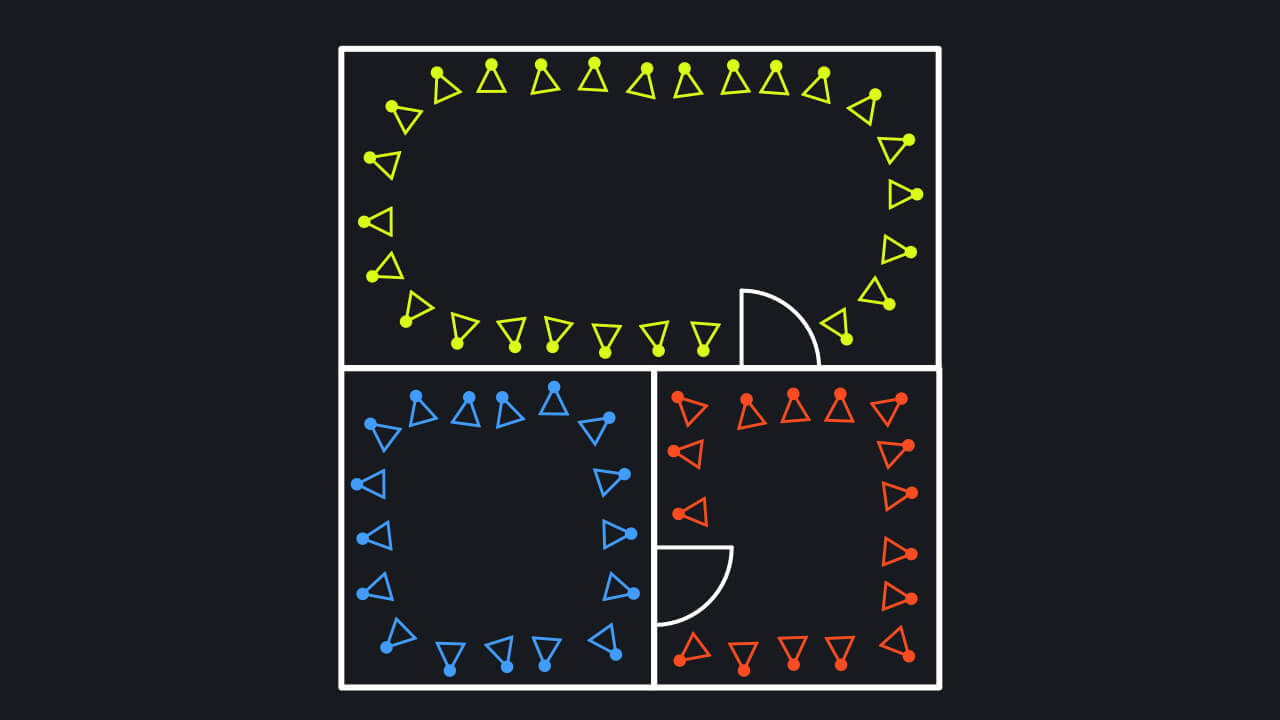
Indoor spaces
Large indoor spaces can be divided into separate maps for each area or room. This makes it easy to update any areas that may change over time. It also makes is easier to maps individual parts.
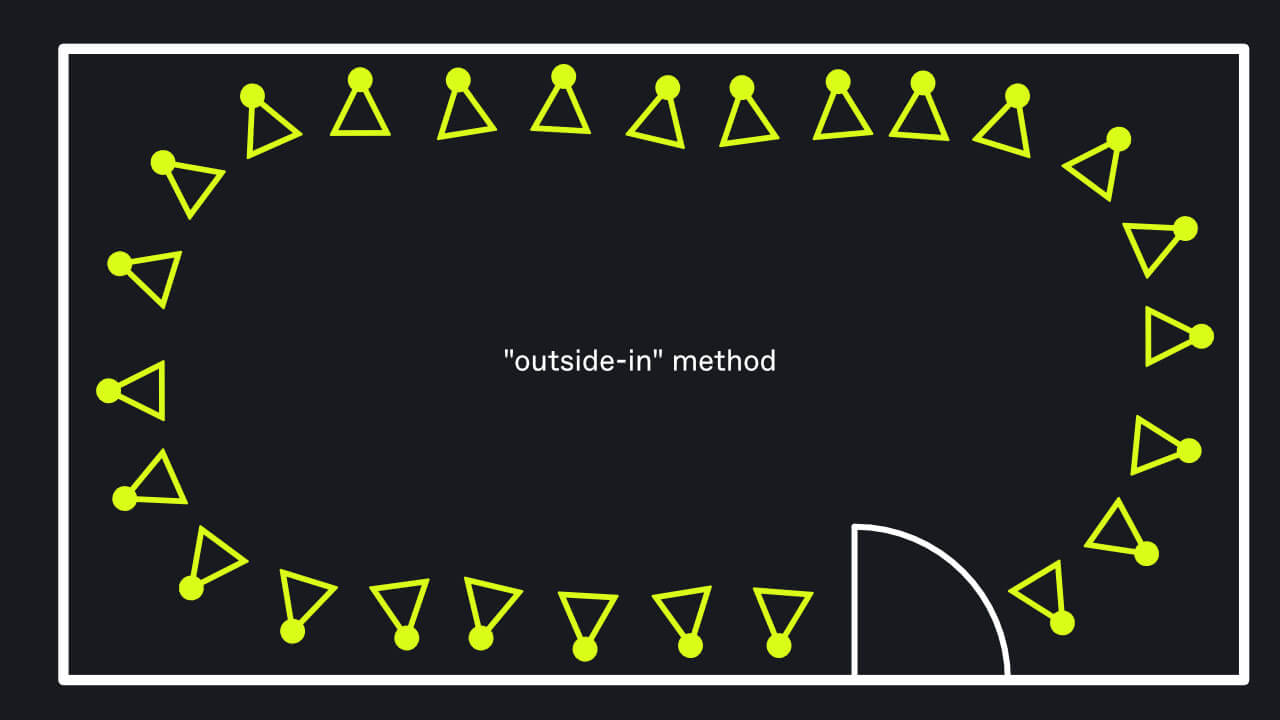
To map a single room, map using the "outside-in" method. Take a series of images while moving around the perimeter of the room looking across the space.
Remember that you can use either landscape or portrait mode. In smaller rooms, landscape often works very well.
Just try to cover the whole area from as many angles as possible.
You can align multiple maps together in Unity with our Multi Map feature. Not all areas need to be connected in just one map.
If you want to connect many separate areas together in one map, you need to make sure the areas can be connected visually. One way is to create an "image path" from one space to another.
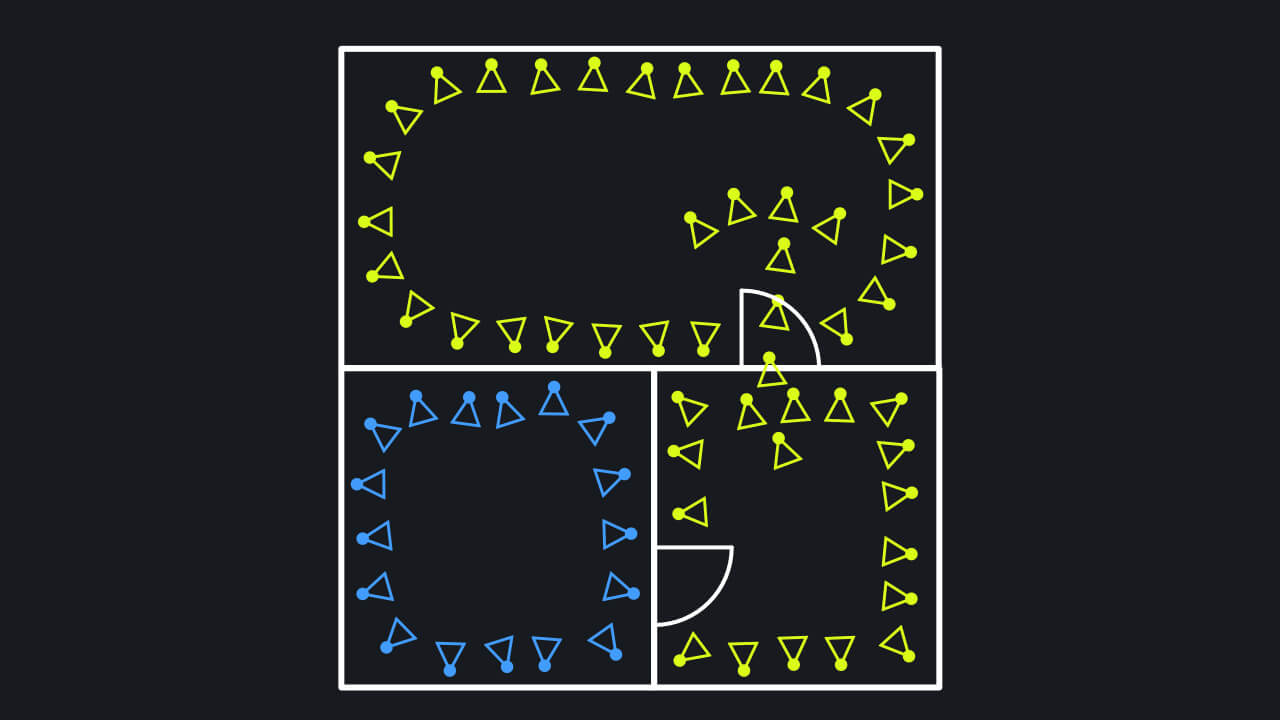
It doesn't matter if you're mapping a small apartment or a shopping mall. The mapping techniques scale with the spaces.
Anchor Images
By default, the constructed map is in no specific orientation!
The Y-axis of the map might be correctly pointing up, but rotation around the Y-axis is not constrained and can change between different constructions if you remap the same space.
Using just GPS or the device compass to orient the map is not reliable enough.
This makes it difficult to maintain AR content so we provide a way to accurately define the orientation of the map.
With an Anchor Image, you can make sure the map orientation is preserved when remapping a space.
Only the latest Anchor Image is used when constructing a map.
Using Anchor Images
When using the Mapping App, open the Tools Menu in Workspace mode and click Add Anchor Image.
A notification should appear when Anchor Image is captured.
When adding the Anchor Image, an image is captured and the device orientation is recorded. The recorded orientation is then used when constructing the map.
When capturing the Anchor Image, the device camera direction is used to determine the map Z-axis.
Map Y-axis is automatically computed based on the device sensors and "up" direction.