Rendering Assistant
What is the Rendering Assistant(Prefab baker)?
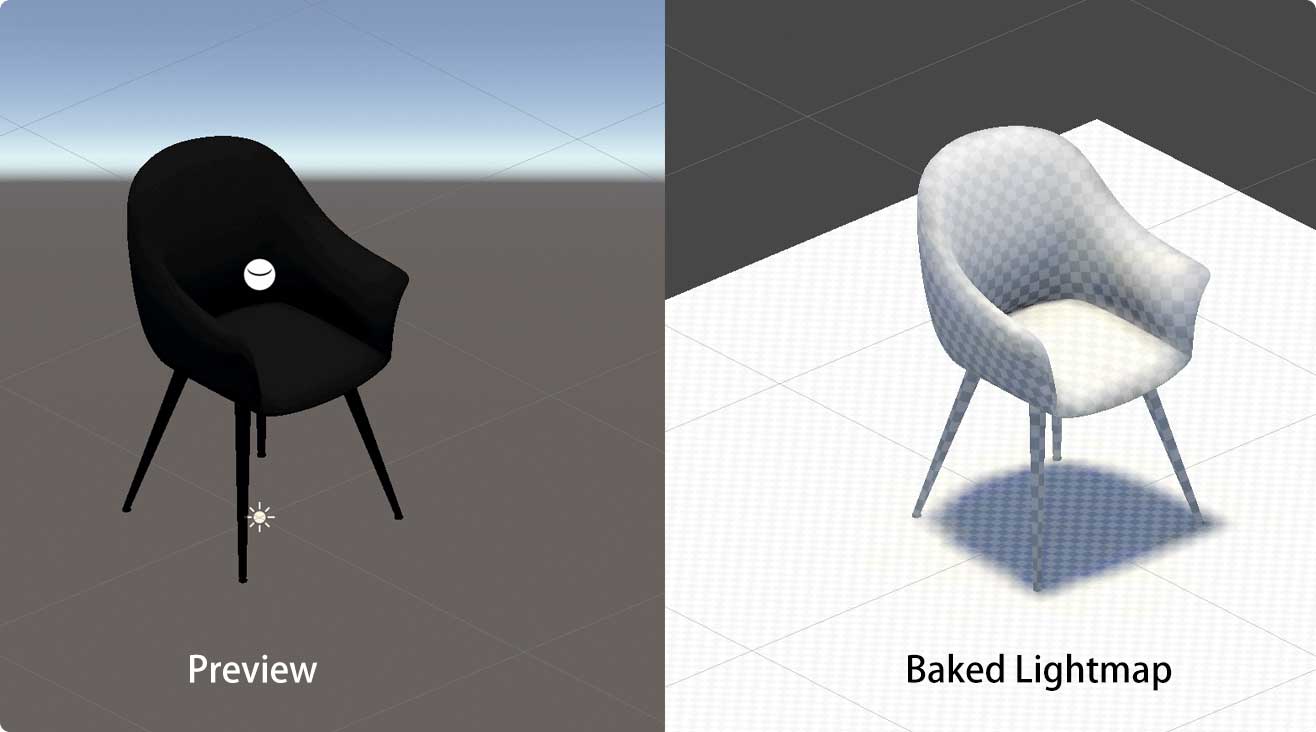
The idea of prefab baker is to allow adding prefabs with baked lightmaps during play into the active scene. Credit:https://github.com/nukadelic/Unity-Lightmap-Prefab-Baker
How is done?
Unity will bake lightmaps for the current active scene, the resulted image files will be moved to the target prefab folder. The prefab baker script in the prefab object will store those lightmaps references relative to each rendered component inside the prefab alongside the index, UV's scale offset. Once the prefab is added to the scene it will scan the current existing lightmaps and add any missing lightmaps.
Notes:
- Make sure the lighting settings of your bake scene will match your level scene ( same skybox light source and directional lights if any )
- Quick bake was made for rapid lightmap prototyping which will use low quality for quick bake preview ( using this potions will not override the current scene lighting settings )
- When baking multiple prefabs their lights will effect each others lightmaps if they are spaced closely together, its recommended to bake one prefab at a time to avoid this result or place the prefabs far away from each other.
- Adding the script to an object which is not a prefab and clicking bake, will automatically convert the game object into a prefab and save it in the same folder as the current open scene
- By default the lightmaps export folder will be located in Resouces/Lightmaps.
- The lightmaps will be copied to a new folder inside the selected target folder. To avoid lightmap collisions, make sure all baked prefabs have unique names across the project.
How to use Rendering Assistant in XR-MOD?
Install
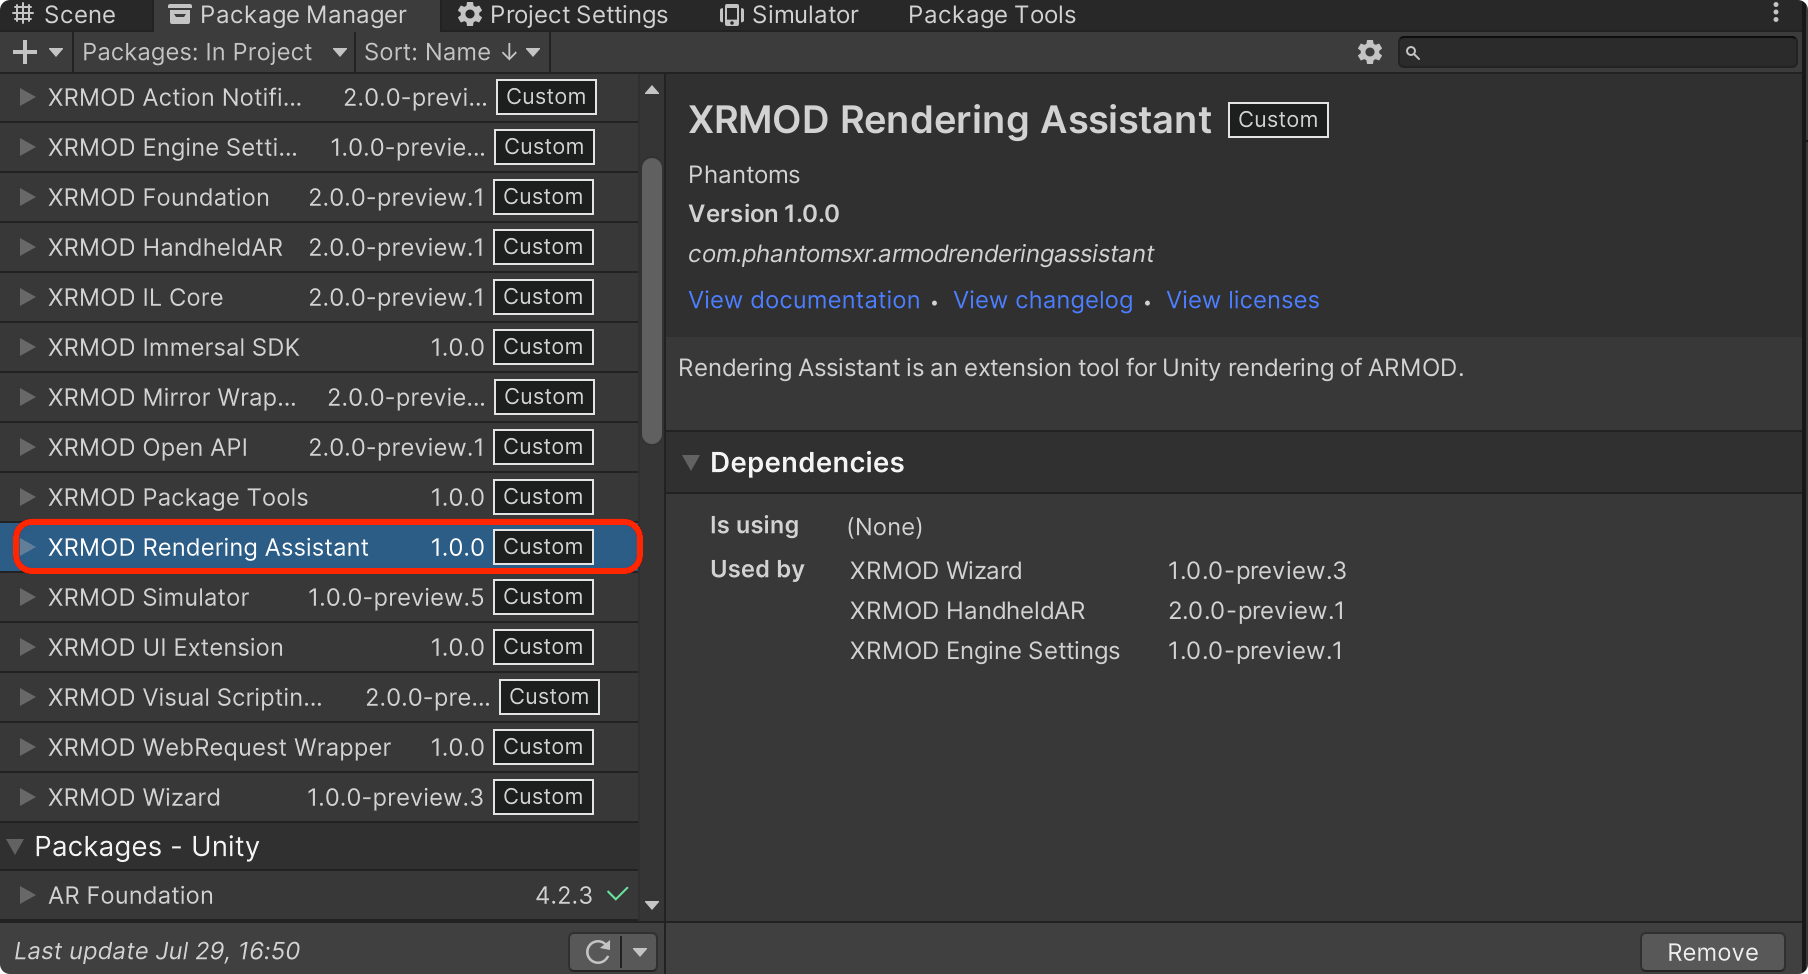
At the first you need install the Rendering Assistant from our registry. We can open the package manager panel and switching the registry to My Registry ,then you can see the XRMOD Rendering Assistant in the package manager panel. Prefab Bake was include in it, so we need install it! Hit the Install button to install this package.
Use guide
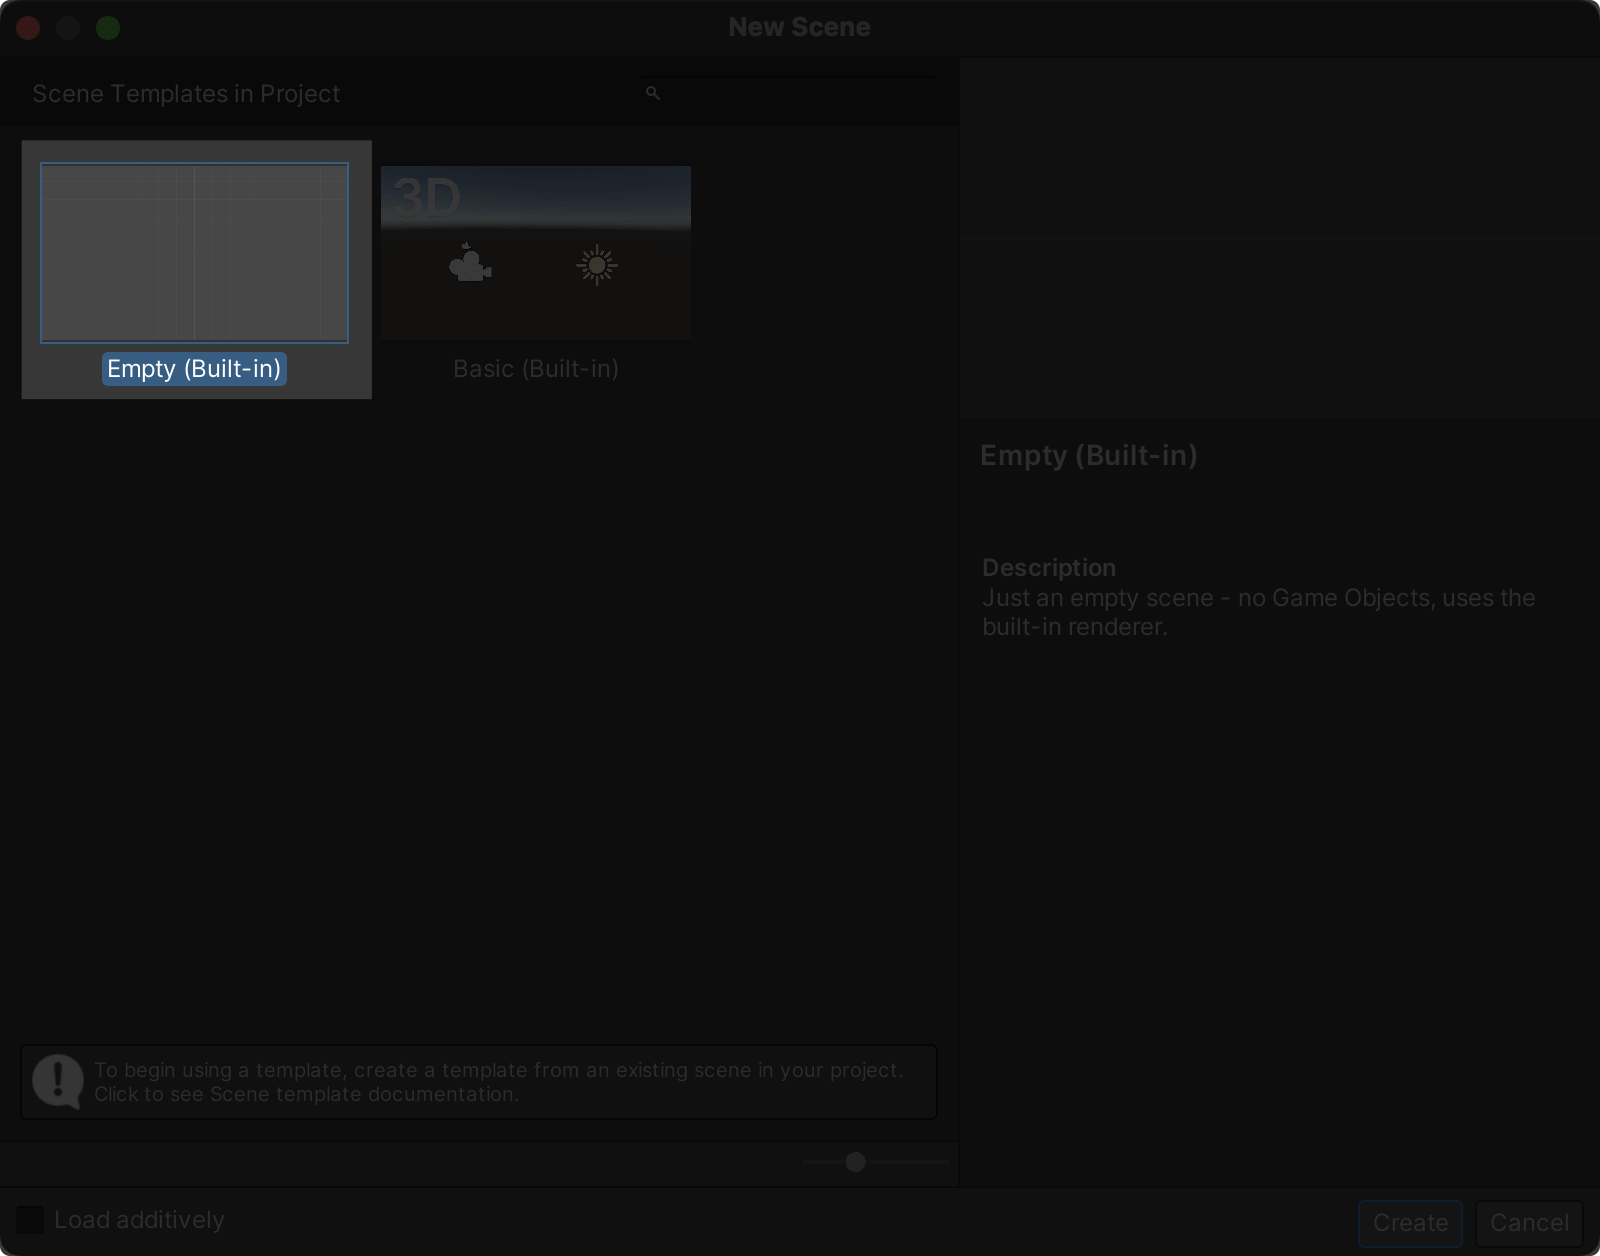
Create a new scene for baking. Selected the Empty(Built-in) Scene tempalte to create.
Create three Empty GameObjects and name them: Chair (name as you like), Meshes, Lights. Then put Meshes and Lights under the Chair and make them child objects of Chair.

Drag and Drop our AR virutal object from Assets to Hierarchy. And let our AR virutal object become child object of the Meshes. And place all lights under the Lights node.

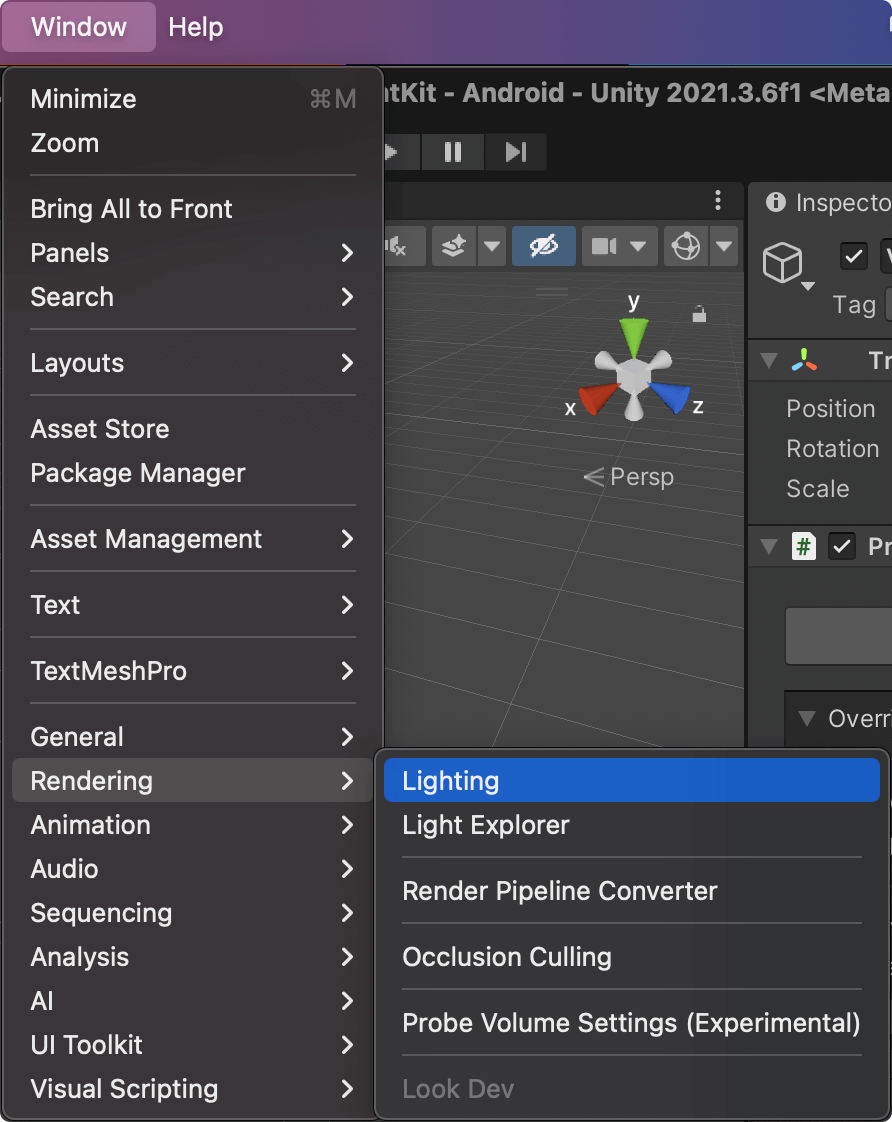
Make sure the Lighting Settings Assets is already, if not you must to create new one by New Lighting Settings button.Open the Unity Lighting panel via Window->Rendering->Lighting.
 | 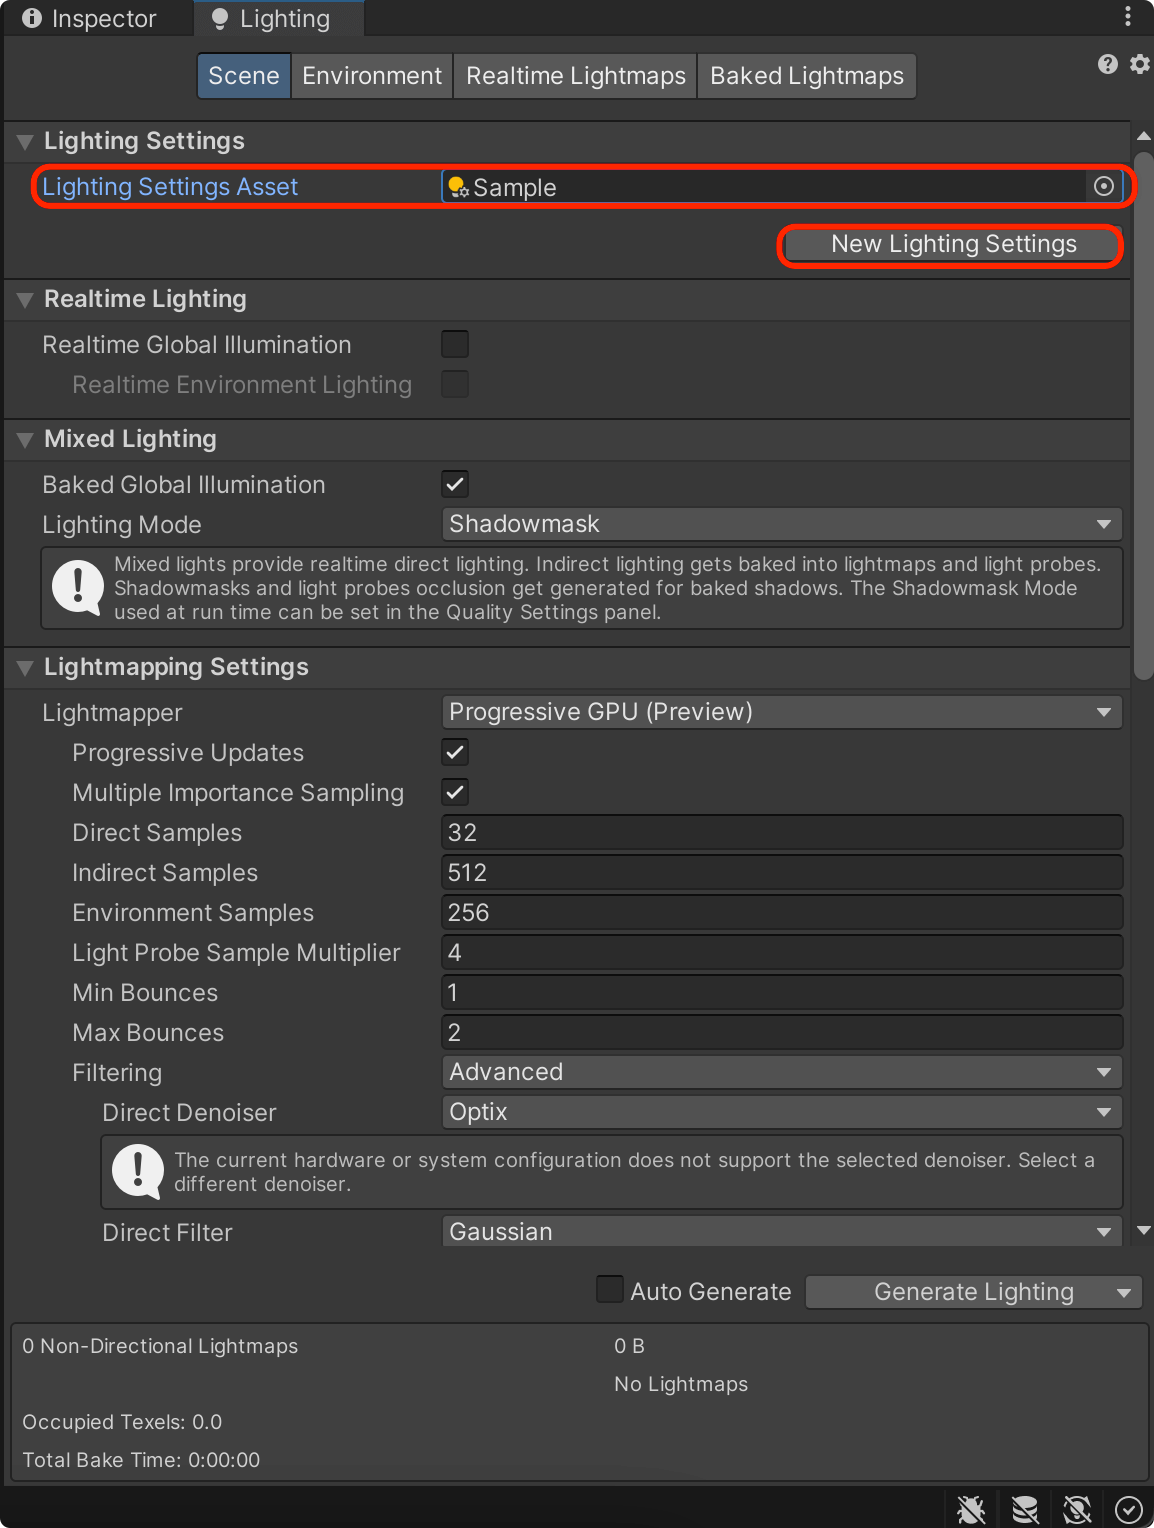 |
If you want to get better baking effect, please make detailed adjustment and experiment to the baking value in the lighting panel.
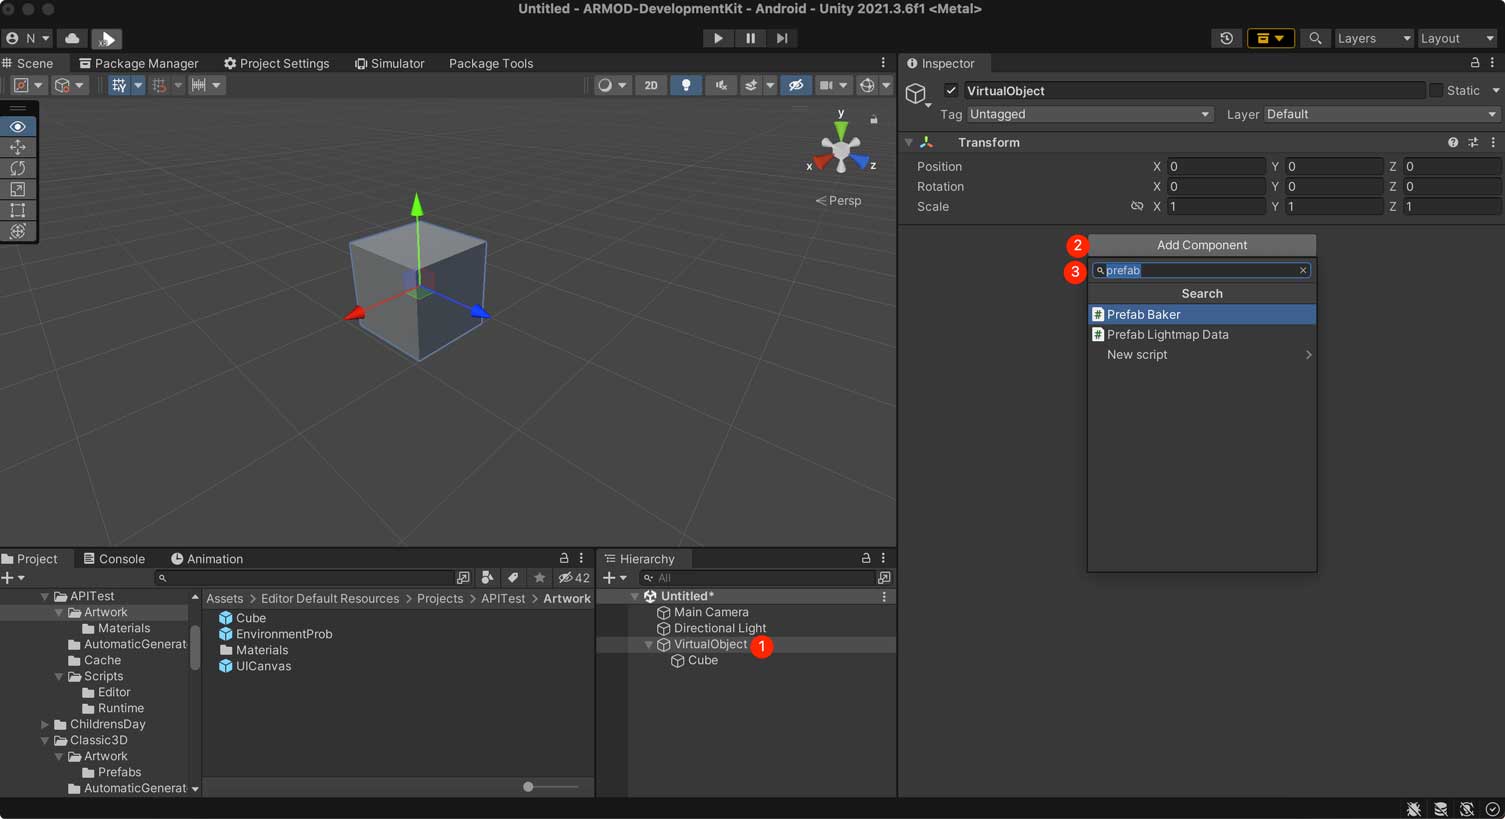
With all the lighting setup, we need to add the PrefabBaker script component to our dummy root node. As shown in the image below:
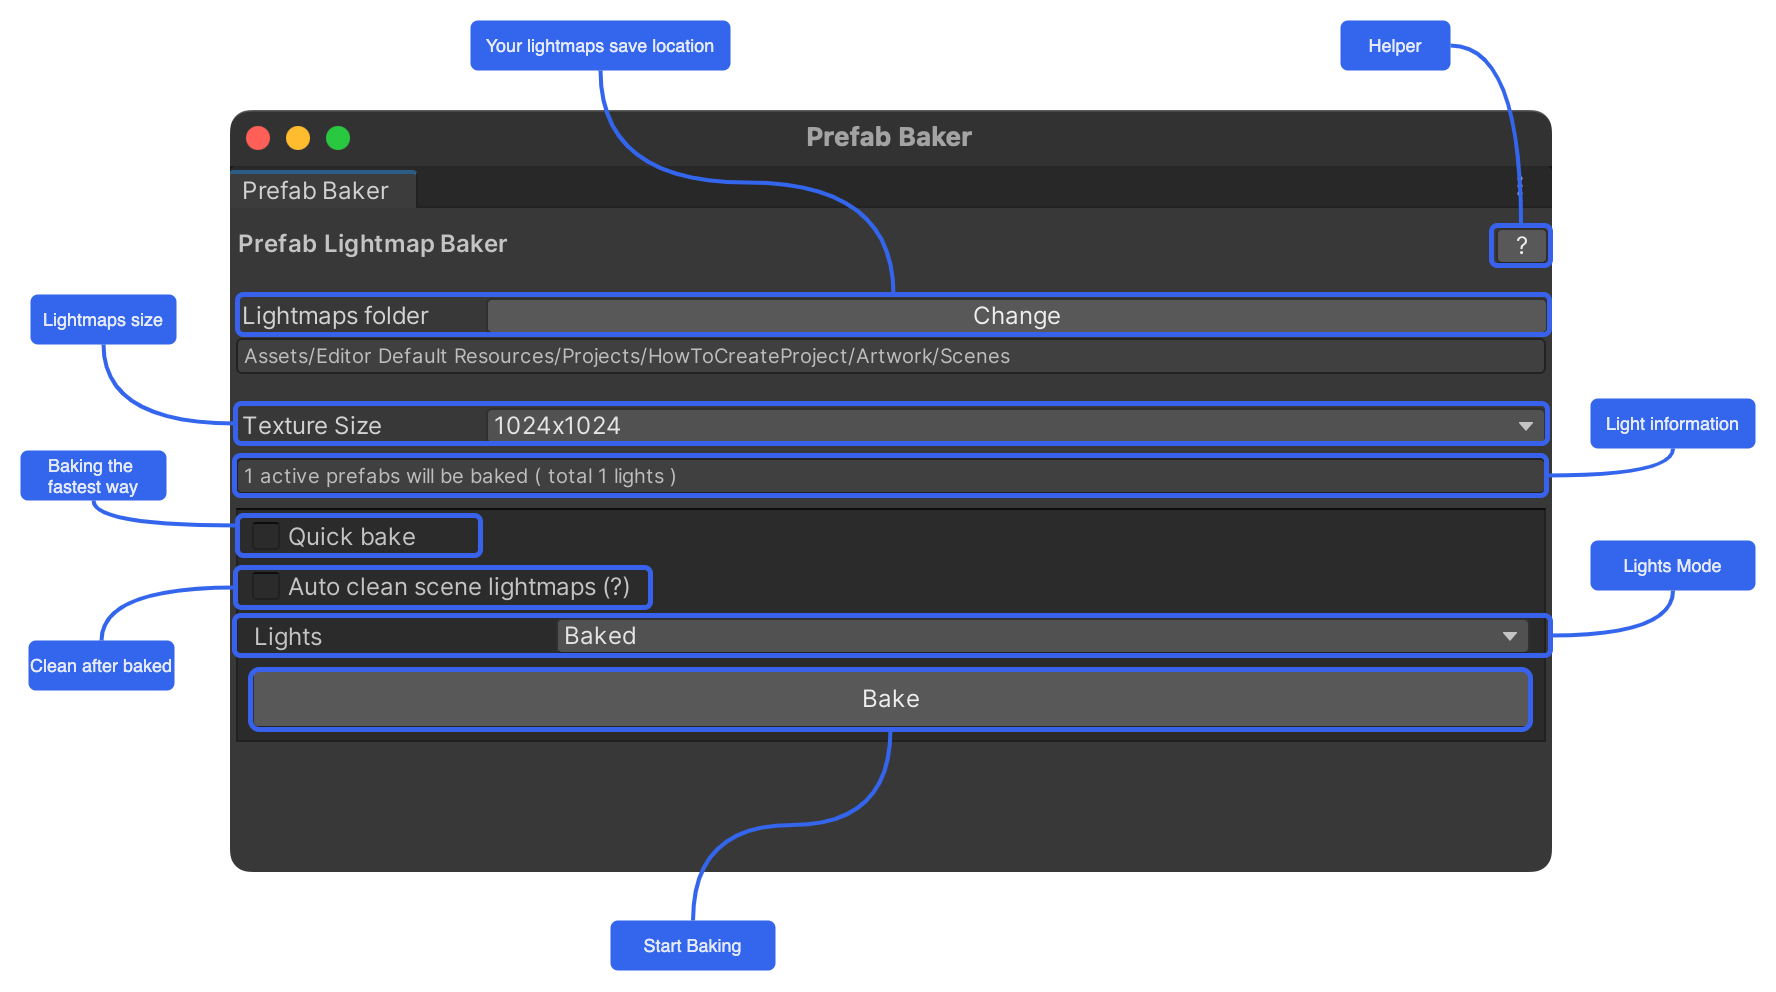
Let's go and bake it. We can open the PrefabBaker setting panel via Tools->AR-MOD->PrefabBaker.
- Change the Lightmaps folder
- Set Texture size(default is 1024x1024)
- Click Bake button to start
Now we have completed the setup. Click the Open Baker button to display baking setup panel. We can see the error in the window. Now we need click Change button to reset the saved Lightmaps folder path.
- We recommend that you set the saved path to the XRMOD Project Artwork folder.
- If the
Automatically clean up the scene lightmapis checked, the "Prefab Bake" will clean up all the baking in the current preview. But this does not clear our data, but just preview the data.