World Mapper App
User Interface
SignIn
The app requires a license. You can apply for a free commercial license by sending an email to us(info@phantomsxr.com). The email content format is as follows.
Subject: [Request] XRMOD WorldMapper License
Content: The name of the applicant's company or individual, and the industry sector to be used.
Workspace Mode
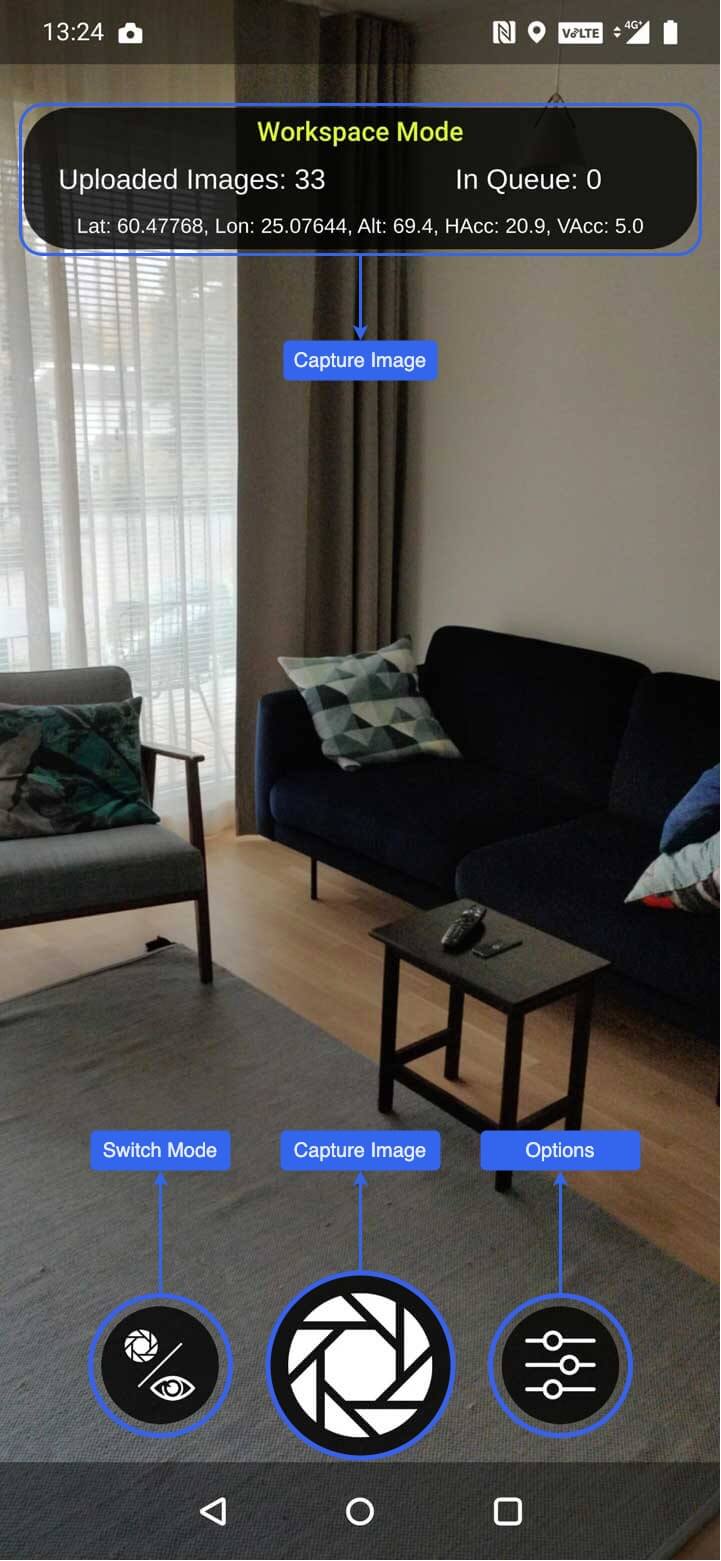
Default View
There's an info panel in the top part of the screen. It shows you how many captured images have been uploaded to the Cloud Service's workspace and how many images are still waiting to be uploaded from your device.
If you have enabled GPS, which you should to fully leverage all Immersal features, the info panel also shows the device's current latitude, longitude, and altitude as well as estimated horizontal and vertical accuracy in meters.
There are three buttons in the workspace mode:
- Switch Mode switches between workspace and visualize modes
- Capture Image captures an image and adds it to the upload queue automatically
- Options opens a dialog for the workspace mode settings and additional functions
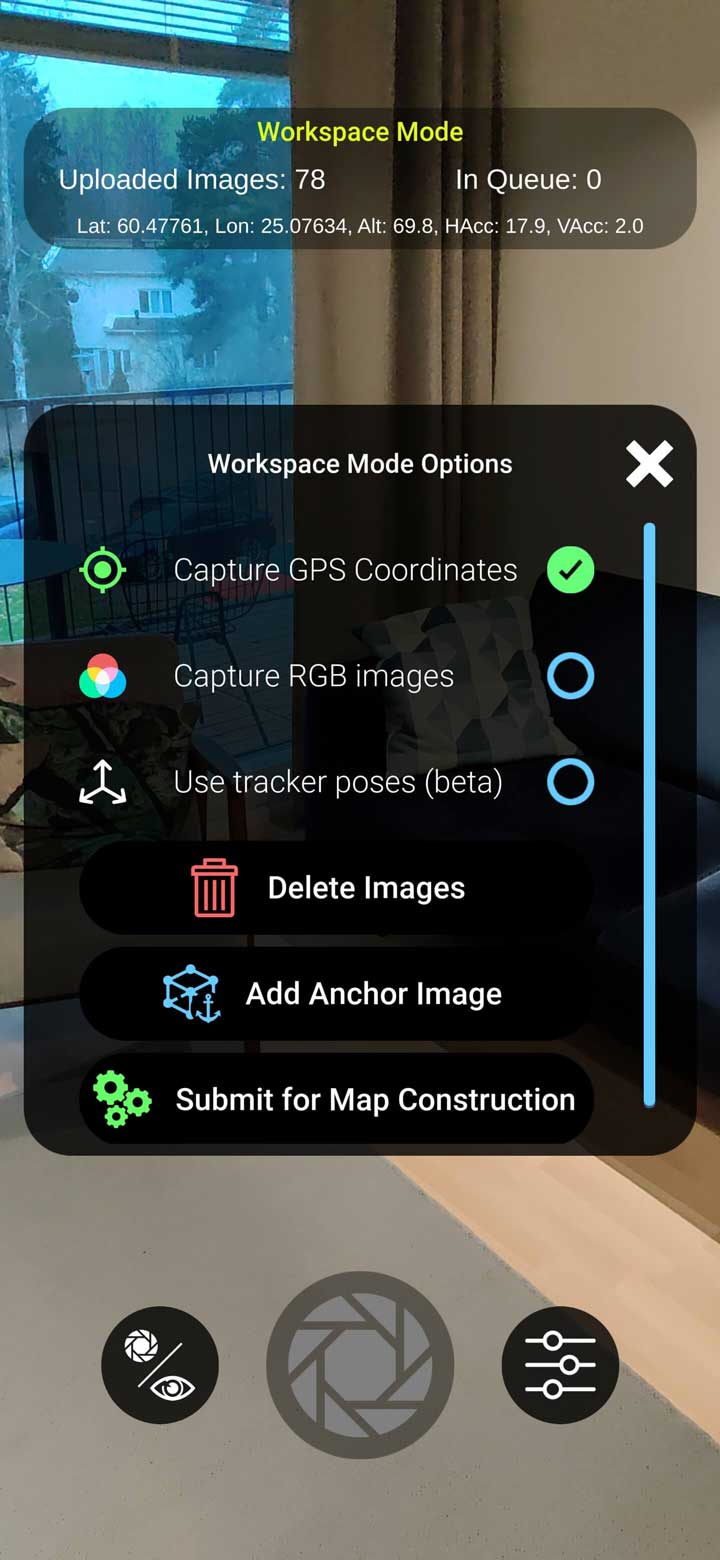
Workspace Options
There are two settings in the workspace mode:
- Capture GPS coordinates uploads device's GPS location along with captured images. These are used to tag and align the constructed map with global WGS84 coordinates.
- Capture RGB images enables the upload of color images (instead of grayscale images) to the Cloud Service. The file size is larger, but the resulting mesh output from map construction will have color textures. Visual positioning performance is not affected.
- Use tracker poses (beta) Uses the tracked pose data from the local tracker (ARKit/ARCore) to speed up map construction. Also allows unconnected areas to be included in the same map. The drawback is less accurate maps if the tracker drifts during the mapping process.
There are also three additional functions in the workspace mode:
- Delete Images clears the workspace. You should clear the workspace before starting to map a new location. You can choose to keep an Anchor Image if available. This is useful when updating a map for a location.
- Add Anchor Image uploads an anchor image or updates an existing one.
- Submit for Map Construction submit the workspace's image set for map construction. After submission, all the data is backed up and you can safely reset the workspace. The data for constructed maps can always be restored later.
Capturing Images
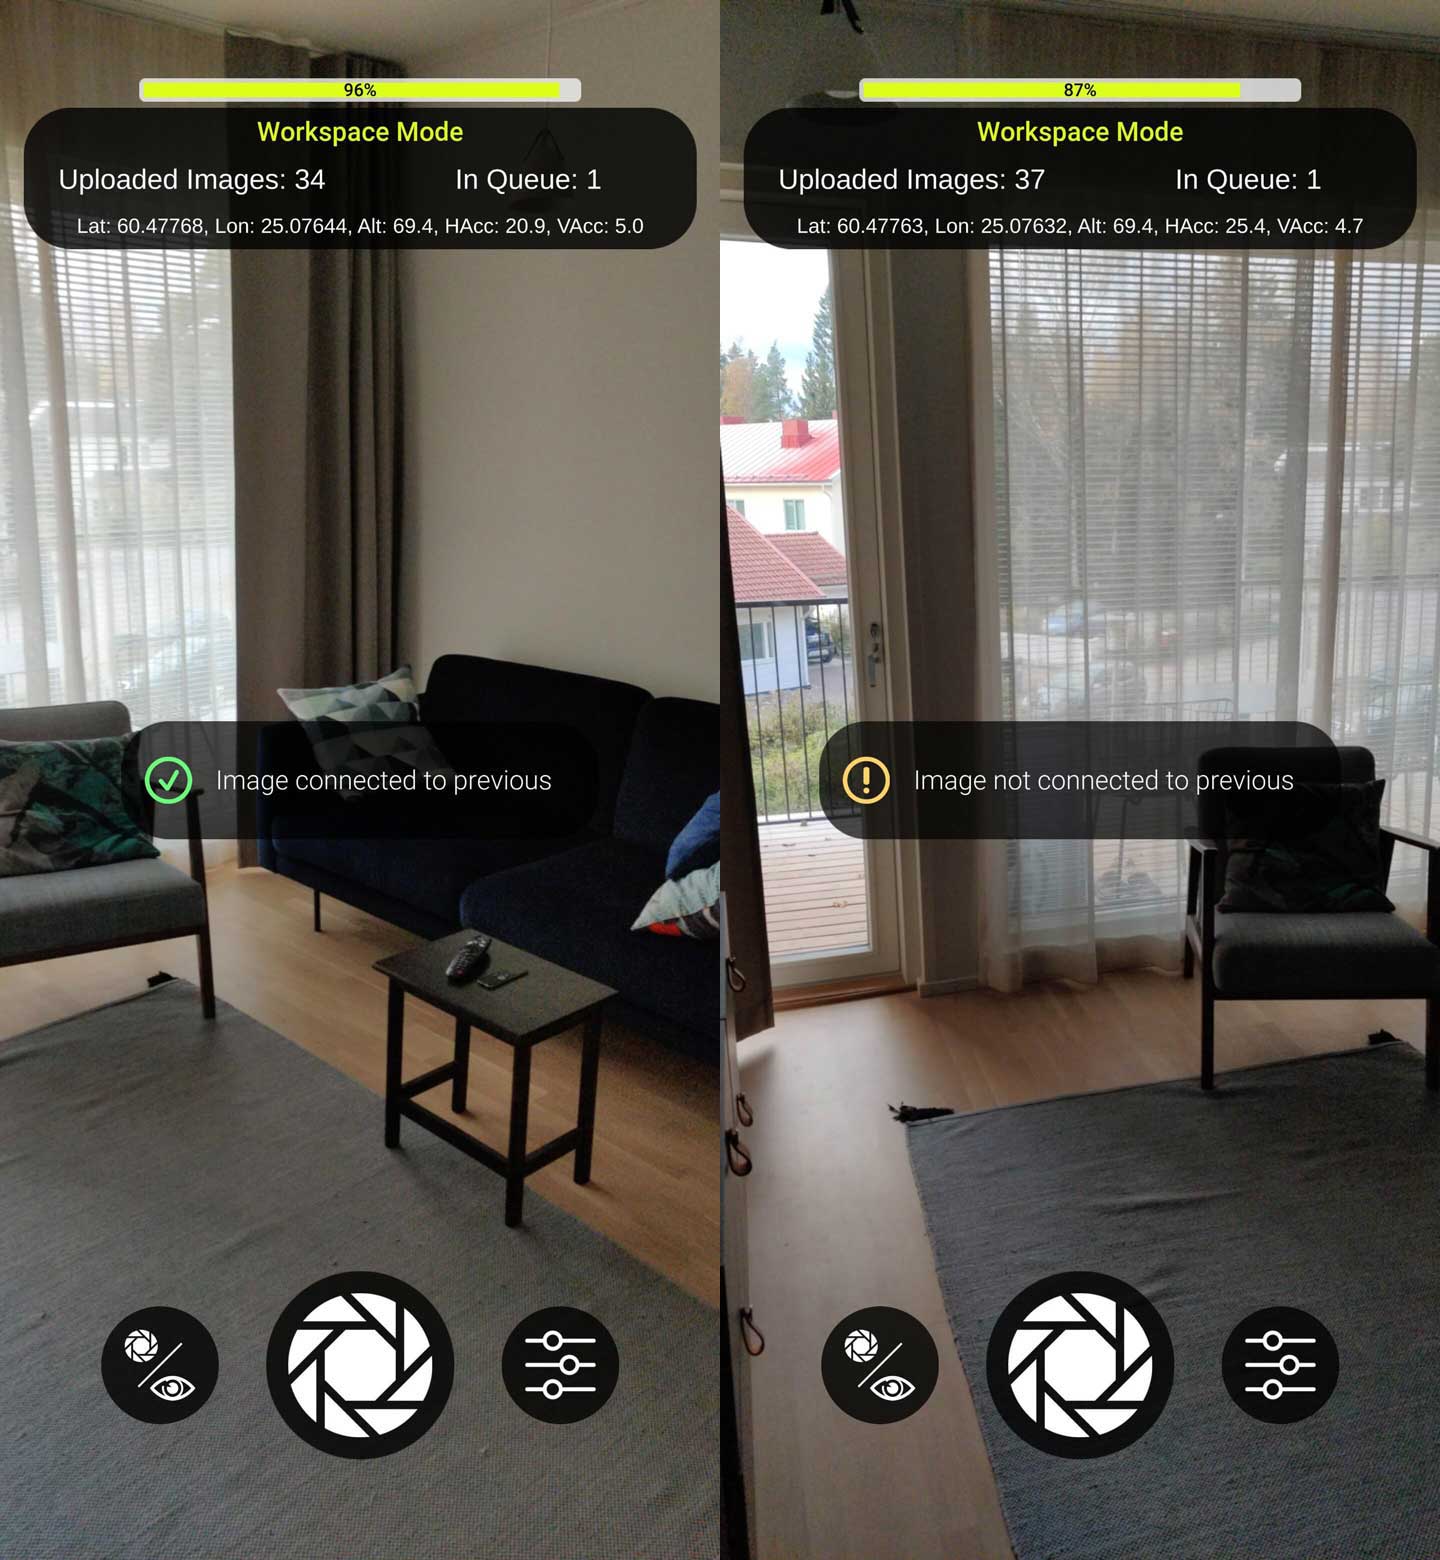
When you press the capture button, two things happen.
- An image is captured and it's compared to the previous image if available.
- The image and other captured data are added to the upload queue. As long as there are items in the queue, they are uploaded automatically and an upload progress bar for each item appears on the top of the screen.
When comparing the captured image to the previous image, the app tries to visually match it. Images need to have visual overlap to match. If successful, an "Image connected to previous" notification appears.
The comparison and notification is a useful guide when mapping but connecting all images in sequence is not a requirement. Images can be connected to each other out of sequence as well. Just keep in mind that every image needs to be visually connected/matched to two others at minimum to be used in the map construction.
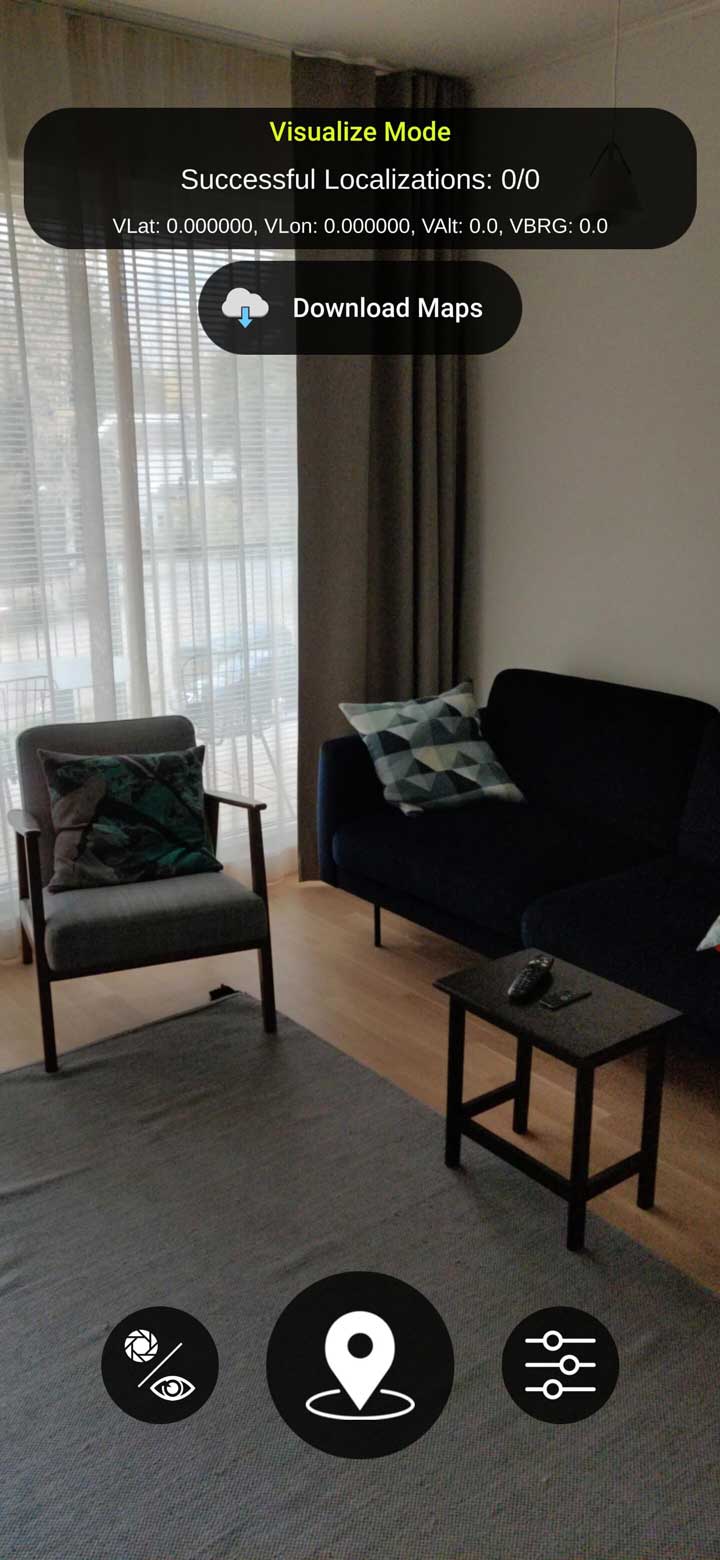
Visualize Mode
Default View
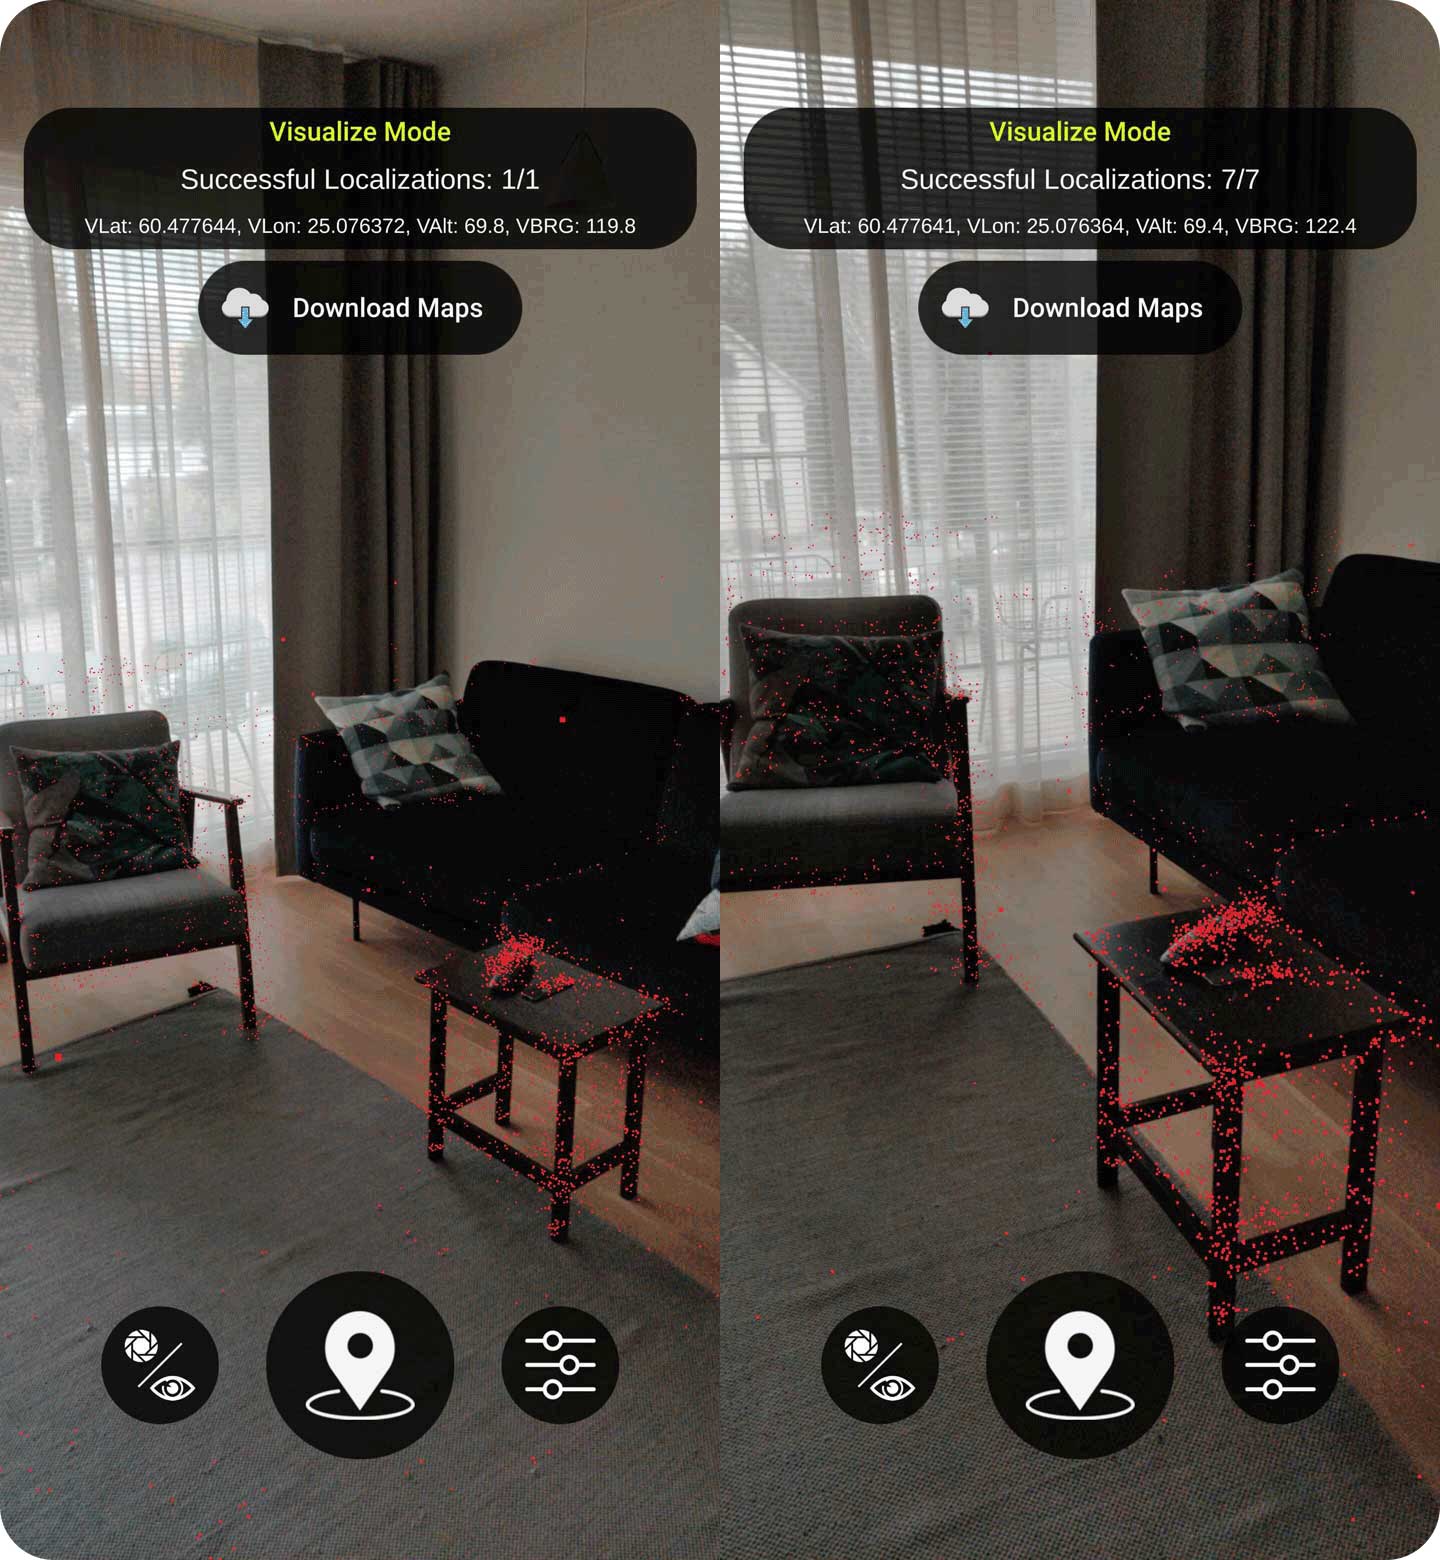
There's an info panel in the top part of the screen. It shows you how many localization attempts were successful out of all attempts.
If you localized to a map with GPS coordinates, the info panel also shows you the Visual GPS position from the Immersal. This position is derived from the map's coordinates but it's updated every frame to match the camera view.
There are four buttons in the visualize mode:
- Download Maps opens the map list where you can manage previously constructed maps
- Switch Mode switches between visualize and workspace modes
- Localize tries to localize the current camera view to all downloaded maps
- Options opens a dialog for the visualize mode settings
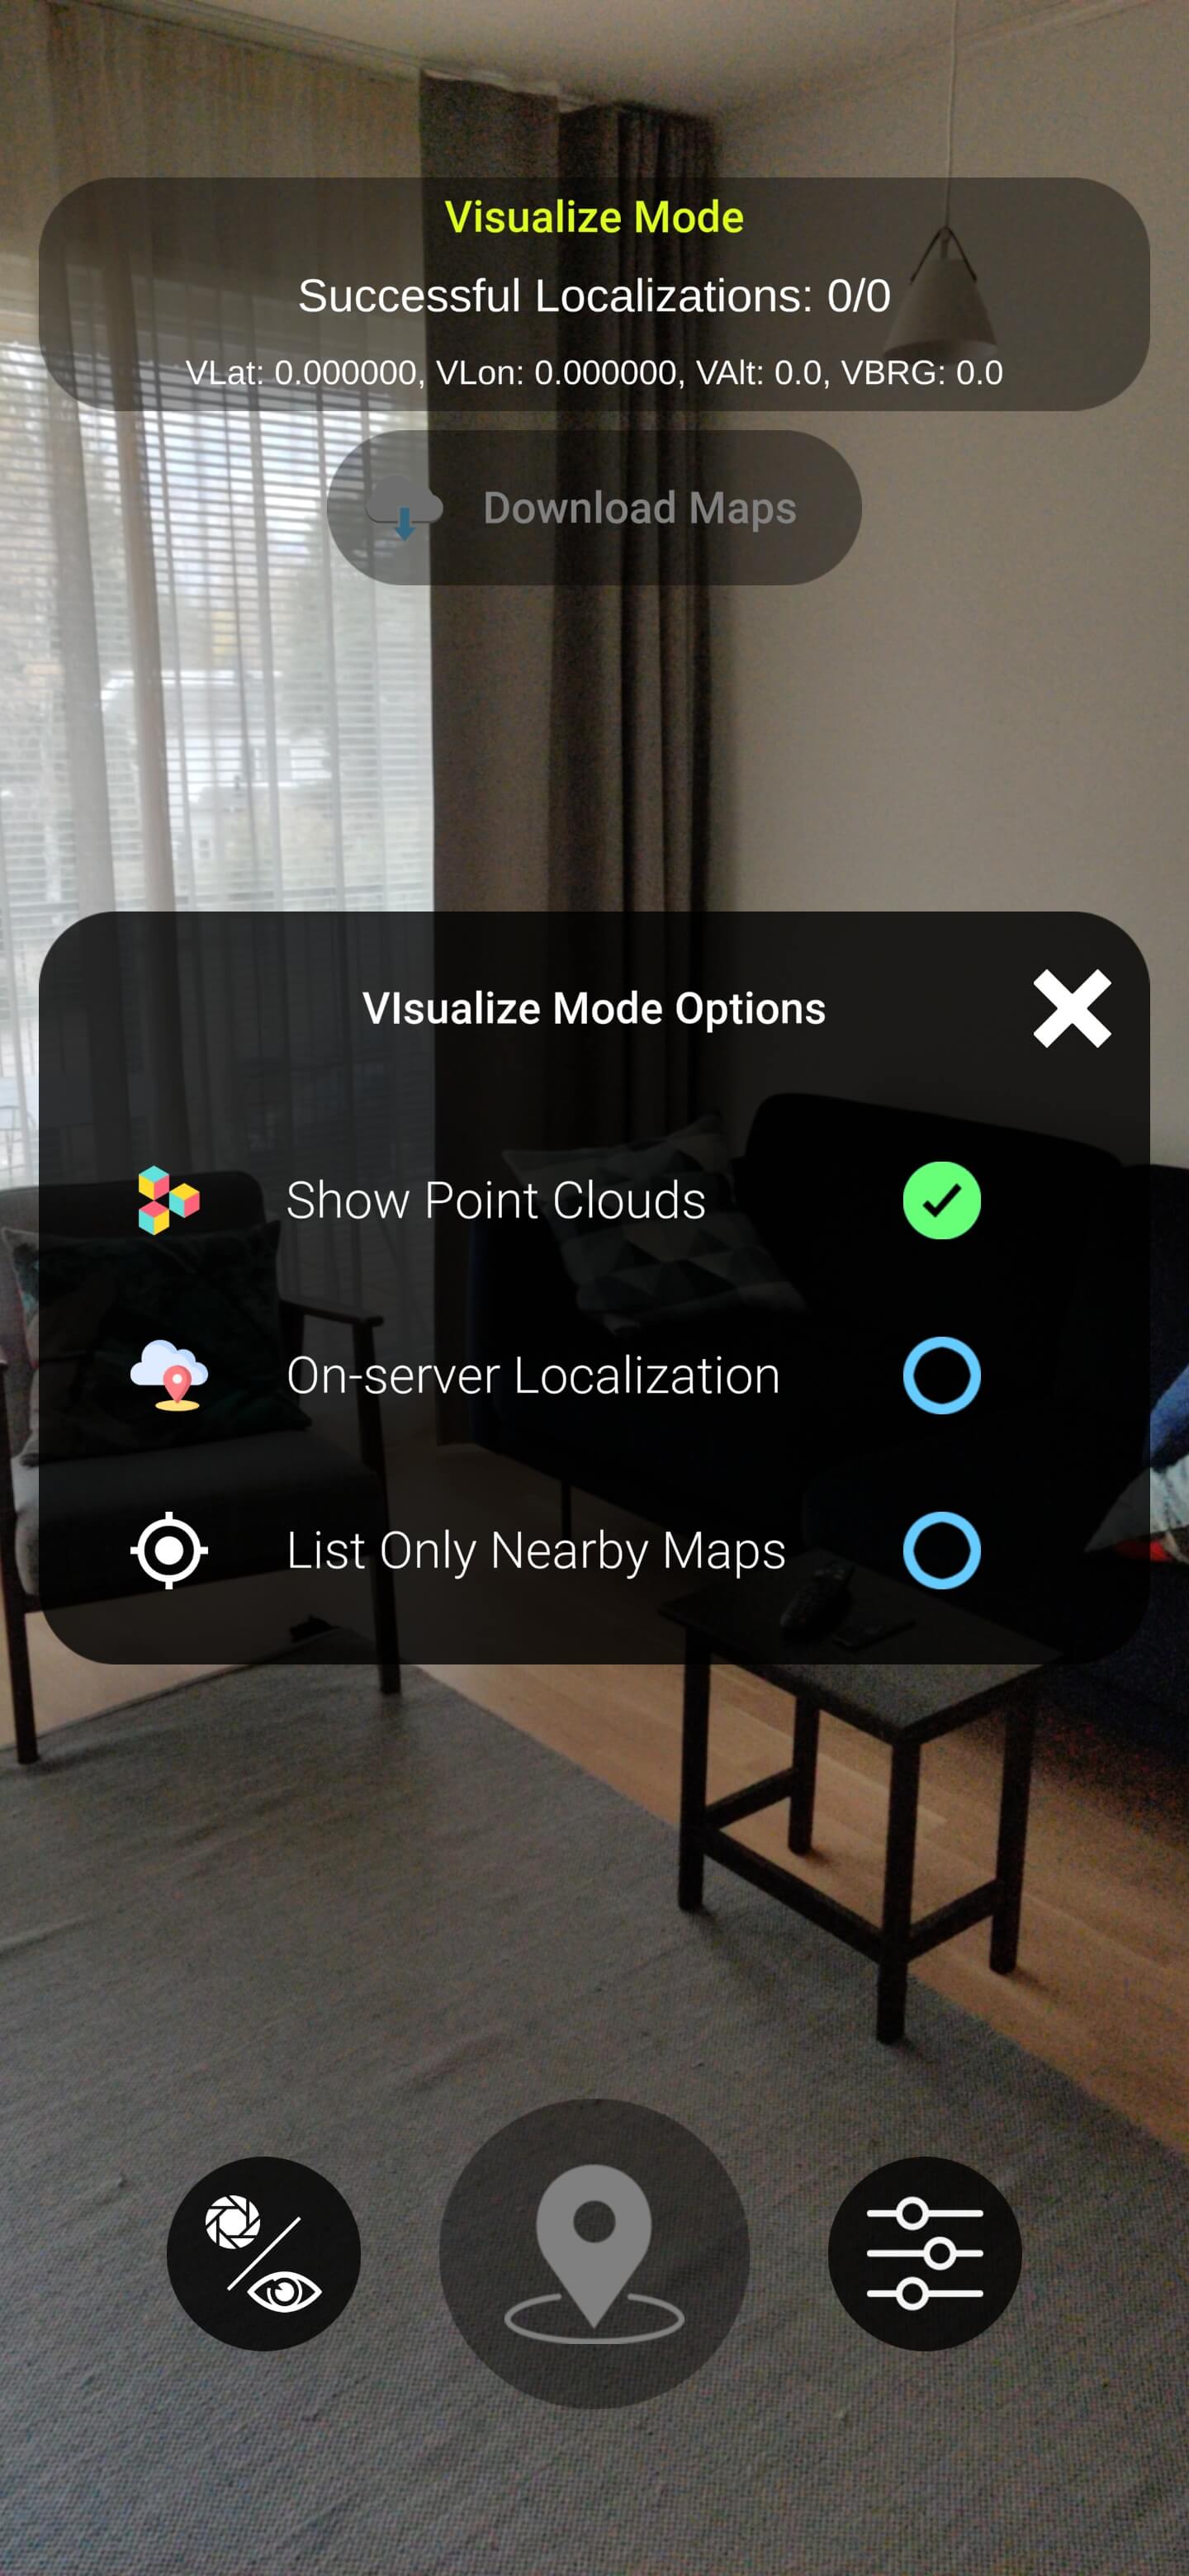
Visualize Options
The visualize mode has three options
- Show point cloud toggles the visibility of point clouds for downloaded maps
- On-server Localization toggles whether localization happens locally on the device or in Immersal's cloud service.
- List Only Nearby Maps activates map list filtering. Only maps within a radius of 500m are displayed in the list
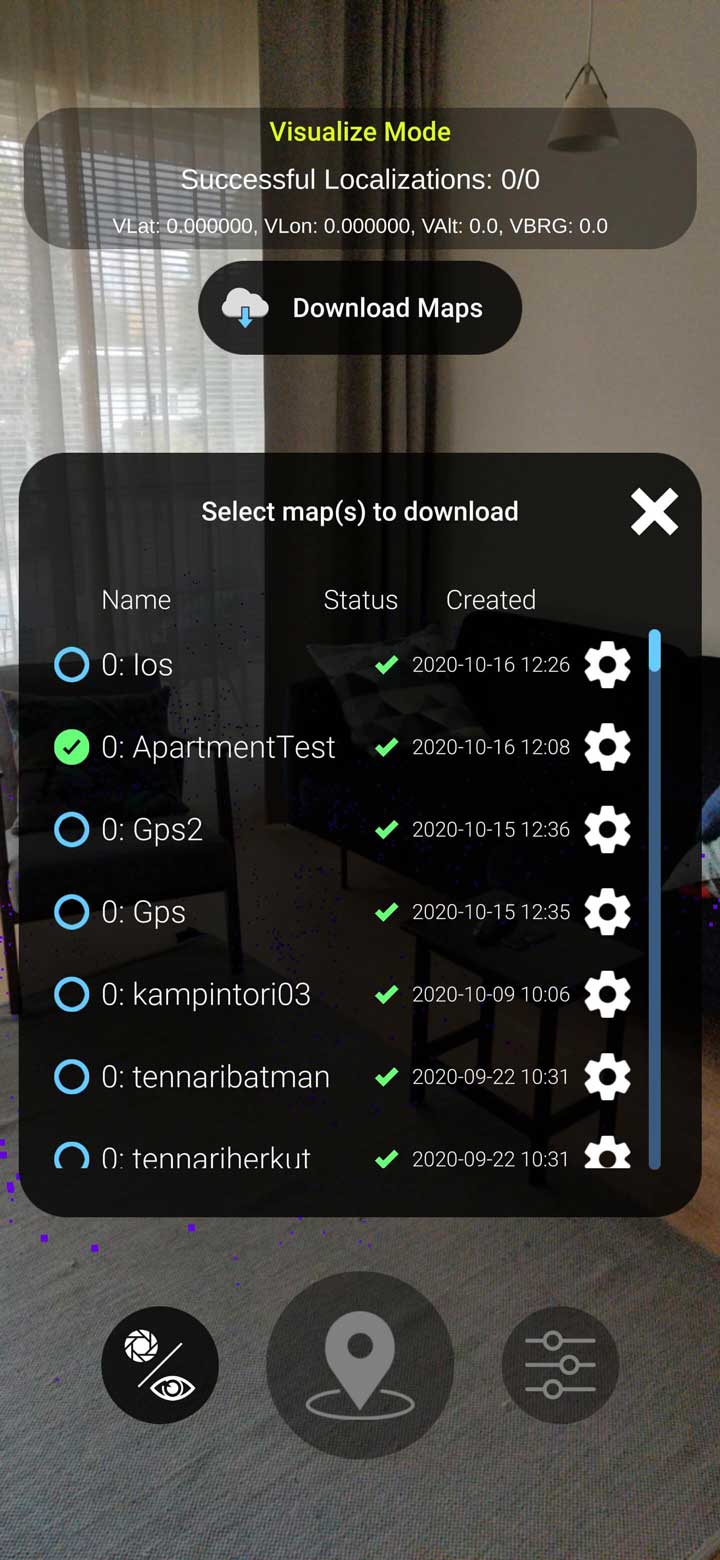
The Map List
A list of all the available maps. You can click on the toggle to download the map to the device for localization. Multiple maps can be downloaded and are shown in the app as point clouds with different colors.
There are four different statutes shown in the map list:
- Queued the map data is queued for processing and map construction
- Processing the map is currently being constructed
- Done the map is ready for download
- Failed the map construction process failed. Most likely the uploaded images did not overlap
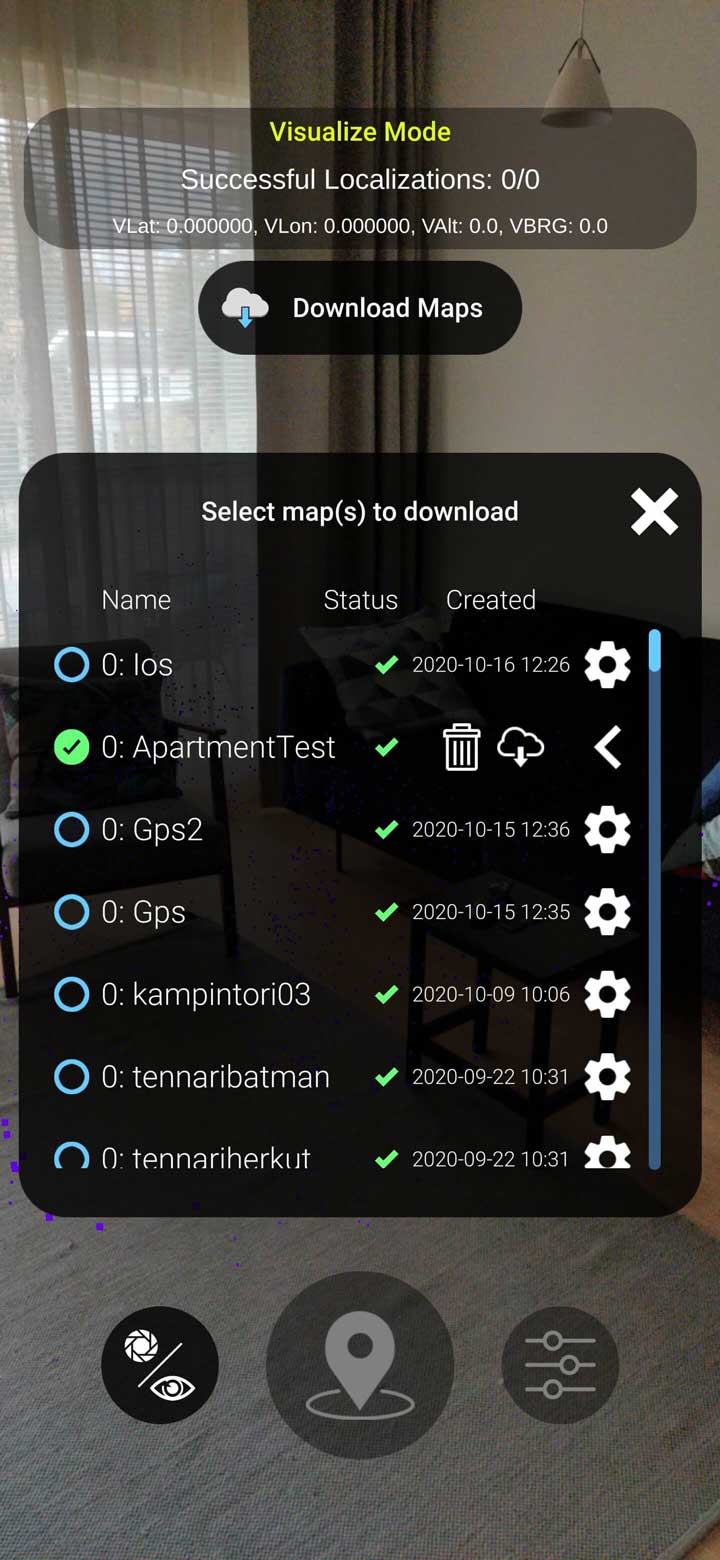
Map Options
Open the options by clicking the button at the right of each map. You can either permanently delete the map and its data or restore the map to the workspace. Restoring replaces any data currently in the workspace.
Localization
After downloading a map or multiple maps, you can test localization. Before a successful localization, the maps are not aligned with the camera view. Localization will attempt to align the maps (map space coordinates) to the camera view (tracker space coordinates).